Sustainable Furniture

How to Remove Odor From New Wood Furniture

Learn multiple methods for removing smells from your new wood furniture

Remove Odor From New Wood Furniture Featured

We’ve all experienced it – that odor from new wood furniture that won’t go away. Some people react to this worse than others, and symptoms such as dizziness and nausea are not uncommon. If that’s you, what should you do?

The best way to remove that new wood furniture smell is by ventilating the furniture and the room with fresh air. Careful use of substances such as white vinegar, charcoal, and baking soda can also help get rid of the smell. Stay out of the room until the smell has gone.

Let’s take a look in a bit more detail:

Why Does New Wood Furniture Smell?

New wood furniture can smell for a couple of reasons:

Firstly, wood itself has a natural smell to it. Many people like this smell, but some do not and find it overwhelming. However, if you find the smell unpleasant, it is more likely to be due to the chemicals used in the furniture manufacturing process – see below.

Secondly, chemicals are often used in the production of wood furniture. This might be in the form of varnishes or paints used for decoration, glues used to stick pieces together, or it could be from chemicals used during manufacturing.

Some wood furniture, particularly those made from composite woods, are treated with chemicals such as formaldehyde during production to cure them. If the wood furniture is upholstered, the odors could also be from chemicals used to make them stain-resistant or as flame retardants.

On new furniture, these chemicals can be released into the air, creating an unpleasant odor and reducing air quality. This is known as off-gassing.

What is Off-Gassing?

Off-gassing is when gas particles and chemicals trapped in the furniture are released into the air. These are typically VOCs (volatile organic compounds). Short-term exposure to these can cause irritation to the eyes, nose & throat, dizziness, and nausea. These effects can be particularly bad for anyone with asthma, or for the young or elderly.

Many products in the home off-gas, and the EPA reports that VOC concentrations are often up to 10x higher inside a home than they are outside. This includes products such as furnishings, cosmetics, and liquids used for cleaning & disinfecting. Some building materials, office equipment (printers, scanners), and craft materials (glues, pens) also contribute.

Levels can be particularly high in new homes where everything is new and off-gassing at a high rate. Older homes tend to have lower levels.

How Long Does It Take for Wood Furniture to Off-Gas?

It’s likely that with a bit of airing, the new furniture smell will quickly go away, likely within a few days or a week. However, although the odors will be gone, it is likely to continue off-gassing for a couple of years after it has been purchased. The amounts of gas given off will be so small as to be undetectable to your nose, although you might be able to smell it if you put your nose right up to the furniture.

Is New Furniture Smell Dangerous?

Is off-gassing dangerous? Companies say no, but a small minority of consumers do report problems.

VOCs like formaldehyde can cause eye and nasal irritation, increase the risk of asthma or allergies, and – at higher levels – increase the risk of some types of cancer. The level of risk depends upon the amount you are exposed to and how long. Most furniture companies claim that the low levels present in their products do not present a risk to the public.

The US has regulations that stipulate formaldehyde levels (products should be labeled TSCA Title VI or CARB ATCM Phase II compliant), but there are no guidelines for other VOCs in residential or commercial settings.

Without further data, we recommend that you always air new wood furniture and avoid being in the same room as it until the odors have subsided (which indicates gas release has reduced to a lower level). Babies and older folks should be especially careful.

How to Remove Smell From New Furniture

The following 6 methods should help you get rid of odors from your new piece of furniture.
Before You Start: Some of the methods below involve using substances such as vinegar and baking soda (bicarbonate of soda) to help get rid of the smell from your new wood furniture. These should be safe, but we recommend you check the manufacturer’s guidelines before using any substance directly on your wood furniture. Always test a new cleaning method on a small, out-of-sight area first to check it is color-safe.

Total Time Needed: 30 minutes

Things Needed

  • Charcoal
  • Baking Soda
  • White Vinegar
  • Air Purifier (optional)

Steps to remove smells from new furniture

Strategy 1: Air Your Furniture and Room

The most effective way to air your furniture is to place it outside. Ideal conditions are when it is sunny with a breeze, as this will air your furniture best. We do not recommend putting your furniture outside in adverse weather conditions – don’t risk ruining it.
If you cannot put your wood furniture outside, increase ventilation inside the room by opening the windows for the day to allow plenty of fresh air in. Continue to do this for a few days if necessary.

Strategy 2: Use Charcoal to Soak Up VOCs

Charcoal has been shown to soak up VOCs to improve your indoor air quality. Place some in a bowl in or on your wood furniture and leave it to help eliminate odors. Note: the charcoal requires air to be able to come in contact with the charcoal, so there’s no use leaving it in a completely sealed bag. Coffee grounds are said to have a similar effect.

Strategy 3: Deodorize with Baking Soda

Baking soda (bicarbonate of soda) can also be used to soak up VOCs. This works because most VOCs are acids, and the baking soda is alkaline. When they come into contact, the baking soda reacts with and binds the VOCs.

Strategy 4: Deodorize with White Vinegar and Water

Wipe down your furniture with a mix of white vinegar and water (equal parts) followed by a dry cloth to pick up moisture. You can use a spray bottle if you want to use it on fabric or furnishings. Of course, this may just replace the wood smell with a vinegar smell – but at least its healthier.

Strategy 5: Use an Air Purifier

Some air purifiers can remove VOCs from the air. Look for an air purifier that has a VOC absorber such as zeolite pellets or activated carbon filters.

Strategy 6: Mask the Smell

If you don’t like the new wood smell but don’t feel it is affecting your health, you could attempt to mask it with a diffuser filled with essential oils. We recommend trying to solve the source of the odor first though

Avoid New Furniture Smell By Buying From Sustainable & Non-Toxic Brands

The best solution is prevention: if you purchase sustainably-made furniture which uses fewer chemicals, you will experience less nasty smells (and a lower health risk). Check out our sustainable furniture guide here for more information and for a list of sustainable brands.

Sustainable Furniture

How to Remove Heat Stains From Wood

Learn the 7 most popular tips for removing white heat marks from wooden furniture

Remove Heat Stains From Wood Featured

A white heat stain can ruin the appearance of your wooden table or desk. Covering up the stain is a potential solution, but wouldn’t it be better to remove it? You’re in luck, as we’ve got 7 ways to remove heat stains from your wood furniture – and it can be surprisingly easy to improve the look of your wood tables or other wooden furniture.

Methods to remove white heat stains from your wood furniture include the use of common household products such as a steam iron, mayonnaise, white toothpaste, and even oil and salt. Read on to find out how and why these products work, as well as a few other methods for removing your heat stain.

p.s. if you decide you need to replace your wood furniture you might want to check out our sustainable furniture guide, which is full of eco-friendly and stylish options for your home.

What Causes Heat Marks on Wood?

When you put a hot cup of coffee or a hot pizza box onto your wood table or any kind of wood furniture, the heat from the object causes pores in the wood to open and take in moisture. As the wood cools, the pores close, and the moisture becomes trapped inside the wood surface, creating those unsightly white stains.

If you have black marks on wood, these are unlikely to be caused through everyday heat. The most likely explanations are charring, oxidation, and rotting. This article concerns white marks and the tips included will not help remove black stains. If you do have a black stain caused by water damage we recommend you check out this article on removing black stains from hardwood floors.

How to Remove Heat Marks on Wood (7 Strategies)

Here are the best ways we’ve found to remove white marks from your furniture. Please note that your results may vary according to the type of wood your furniture is made from, or if it has a varnish or finish. We strongly recommend you that you first test the method on a part of your furniture that is not visible to check that it works for you. If your wood is varnished, these methods may not work (especially if the varnish was applied after the stain was introduced) and may damage the varnish – you have been warned! If you want to minimize risk, speak to a wood restoration expert rather than going the DIY route.

Once you have removed the stain we recommend you apply a varnish to help protect the wood from future damage.

Total Time Needed: 1 hour

Using a Steam Iron

The iron method is the one users have reported the most success with. It seems paradoxical that to remove heat stains you need to apply more heat, but that is how this method works. The idea is that the iron will re-open the pores in the wood and allow the trapped moisture to be released.

First, clean the wooden table or other affected surface with a slightly damp cloth to ensure there is no dust. Then, place a cotton towel over the stained spots and put your iron on a low heat setting and place it onto the towel. Let it rest for a short time, then check. Alternatively, you can just iron the area. This should help in removing the heat stain quickly and efficiently. Don’t make it too hot or you may burn your furniture!

If this doesn’t work, use steam and repeat the process. If you don’t have a steam iron, spray some water on the towel. Just make sure not to hold it on the wood for too long. You can also hover the iron above the stain without using the towel.

White Toothpaste

White non-gel toothpaste contains baking soda which is an alkaline substance that can react with a heat stain to remove it completely. For best effect, mix the toothpaste with pure baking soda to create a paste. Mix toothpaste and baking soda together in a bowl, add a few drops of water if necessary, but it is better to try and create a paste without adding water. If you don’t have any, toothpaste can work by itself. Remember: the toothpaste method works with regular toothpaste but not gel toothpaste.

The surface needs to be completely clean and dry before attempting this method. Rub this mixture into the heat stain present on your wood surface. Wait about 10 minutes, then wipe away the toothpaste and baking soda mixture with a clean cloth.

Mayonnaise or Petroleum Jelly

Another effective way to remove white marks from wood and that makes use of items you probably have at home is the mayo method. Mayonnaise and other oily substances, like petroleum jelly, can release the trapped moisture in your wood furniture.

With a cloth, rub the mixture over the white stain. Let it set for at least one hour before cleaning it off.

Oil and Salt

Did you know oil and salt can help remove stains from wood? Apply a paste mixture of salt and olive oil into the affected area. Wait one hour then wipe off with a clean cloth

Vinegar and Oil

Mix equal amounts of olive oil and vinegar, then use the mixture to clean the heat stain. Wipe with a clean cloth, making sure you remove all the liquid.

Steel Wool

A ball of super fine steel wool (#0000) with lemon oil or olive oil can be used to clean the heat marks gently. Test first as the wrong steel wool could damage the surface of your wooden table; scratches will probably look worse than a heat stain or white mark, so be careful not to overdo it!

Sanding Your Furniture

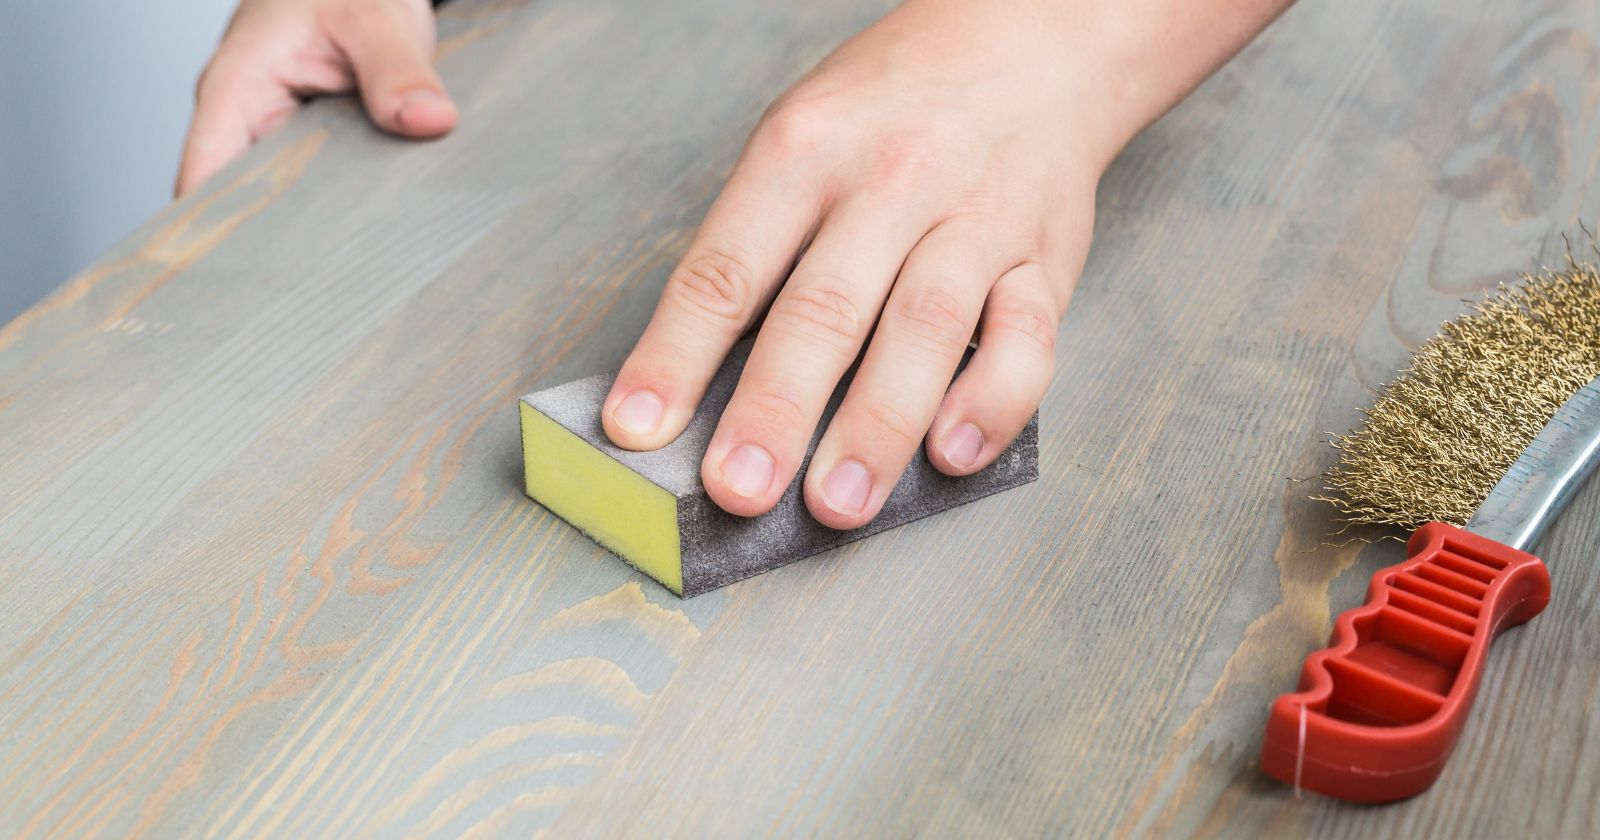
It’s harder to remove white heat marks on older tables or furniture because the moisture is deep inside the wood. In this scenario, your only choice may be to sand the area affected by the heat stain. This involves using sandpaper to rub down the wooden table and remove the heat stain.

Once the white mark is gone you may need to repaint the table to cover the mark left by your sanding and/or clean the surface and apply a finish to protect it. If you are not confident in your DIY skills you may wish to leave this to a professional.

How to Prevent Heat Marks on Wood

It’s better to prevent heat marks than to remove them. Investing in coasters for cups and dish mats or heat mats for your meals will ensure your wood table is protected from hot items. You may also want to invest in a varnish or wax for your wood surface. These can protect against heat, water, and other common causes of white marks and stains.

How Do You get White Heat Marks Off a Wood Table?

You can remove heat stains off your wooden table using tools and substances found in your home, including an iron, toothpaste, baking soda, or even mayonnaise. 

How Do You Get a Steam Stain Out of a Wood Table?

A baking soda and toothpaste mixture is one of the most popular ways to remove steam stains from wood furniture.

Do Heat Stains Go Away in Time?

Heat stains rarely go away or fade over time without intervention. 

Sustainable Furniture

How to Clean a Bean Bag Chair

Learn how to keep all types of bean bag clean

How To Keep A Bean Bag Clean Featured

Whoever invented the bean bag chair is something of a legend. Who’d have thought that some fabric stuffed with tiny polyester balls could be so comfortable?!

Whether you’re a gamer or you love to dissolve into this comfortable squishy chair to watch a film, it’s a guarantee that your bean bag is going to see a lot of use. But, with regular use comes the big problem: how do you keep your bean bag chair clean?

Whatever the material, we’ve got you covered (just like your plush bean bag chair). Keep reading for tips for cleaning a range of different bean bag covers and tips for keeping them fresh when between cleans.

p.s. need to clean your other couch while you’re at it? Check out our guide for cleaning a couch.

How to Clean Bean Bag Chairs with Cotton Covers

Cotton is a material that takes a lot of wear, can withstand high temperatures in the washing machine, and can even go into your tumble dryer. It’s a great material if there are kids around, with their sticky fingers and clumsy ways.

If your bean bag is generally clean and there are no signs of stains, then a regular going-over with the vacuum will keep it lint and dust free. However, if it’s a chair that gets plenty of use, there may be a stale smell or a stain or two on the material.

When you open the removable cotton cover, first check to see if the beans are sealed in their own separate bag and if they are, remove this bag as one. If the filler balls inside are loose, remove the balls as carefully as possible (trust us – you really don’t want them all over your floor), putting them into a container, such as a large trash bag.

Once the balls have been removed, machine wash the cover with a little laundry detergent. Use a cool to medium heat setting and air dry once the wash is done, unless the care label states that tumble drying is fine.

How to Clean Your Bean Bag With a Suede Cover

Suede isn’t as easy to clean as cotton. You should never machine wash a suede or velvet cover, but there are other ways to stay on top of the dirt.

A vacuum cleaner will once again take off dust and crumbs. If there are stains, spot-clean these with a damp terry cloth that’s been soaked in warm water and a mild detergent. .

If the whole cover needs cleaning, first remove it and soak in a sink or tub filled with the same mix of warm water and mild detergent used above. Leave it for an hour to really help lift any stubborn or stickier stains, and then – to give it and extra clean – give it a once-over with a soft-bristled upholstery brush or even a soft-bristled toothbrush.

Brush using light, circular motions, and then when you’re done, rinse well in cold water to ensure all the soap’s gone. Don’t wring the water out, as tempting as it is. Instead, let it drip-dry over the bath or even better, outside if the weather’s good. Air dry, never tumble dry, and your cover will be good as new.

Consider investing in a suede brush or suede eraser, which is a a rubber block that allows you to rub out stains as though they were pencil errors on paper. This can be an effective way of tackling small marks and scuffs. You could try a metal suede brush but you might find it’s overkill for a bean bag.

How to Clean a Bean Bag With a Vinyl Cover

Probably the easiest of all bean bag covers to clean are vinyl bean bags! There’s no need to even remove the cover piece from the bag, although it might make it easier to get the whole thing cleaned well.

Warm water and some detergent on a damp cloth applied in a circular motion to the surface area will do the trick. A vinyl cover will even tolerate stronger cleaning products if the stain you’re trying to remove is a little bit more stubborn. Once the cleaning’s done, you’ll have the cover dry again in minutes.

Dust regularly with a clean cloth to keep it looking clean, but a vinyl bean bag chair is a dream to keep clean, even if the overall effect in your room isn’t as stylish.

Cleaning a Bean Bag With a Leather Cover

Leather is one of the most versatile and hard-wearing products that could be used in an item of furniture, and we’ve been using it for thousands of years. Even today, real leather bean bags bring warmth and class to a room and makes for a great material for bean bags.

It’s easy to clean a bean bag that’s made with leather. Run a damp cloth over the bean bag once a week, and if you need to remove stains, use a mild detergent with warm or cold water, cleaning in a circular motion. If necessary, take a soft bristled brush to more stubborn stains.

Keep your leather bean bag in tip-top condition by applying leather conditioner once every three months or so.

How to Clean a Bean Bag Chair with a Velvet Cover

Velvet should be treated in similar ways to suede, in that it should never be put into the washing machine, nor should you machine dry. Velvet is one of those materials that looks and feels great on a bean bag but can be a real pain to keep clean.

Keeping on top of it with regular spot-cleaning is going to make all the difference. Vacuum regularly as part of your household cleaning, and if there are any spills, deal with them immediately rather than letting them dry.

Warm water and mild laundry detergent will be your best friend, but it’s never a bad idea to invest in some tools to keep on top of your bean bag cover. A velvet brush is an inexpensive item and just going over the bean bag cover once a week will keep it clean.

Avoid using a stain remover unless you’re sure it won’t discolor the fabric.

It Might Look Clean… But Does it Smell Clean?

Even if our clothes look clean, they still need washing and often, it’s the scent that alerts us that it’s time they went in the wash. It’s the same with bean bag chairs.

Keeping the cover clean using the tips for each material will go a long way, but it could simply be grime and sweat that’s gone into the bag of PVC pellets. If that’s the case, freshen the pellets up by putting them in a trash bag or container, along with a sprinkling of baking soda. Give it a good shake, leave for a while, then return the pellets to the bean bag cover.

Using coffee grounds is also a nifty trick- put coffee grounds into a small, dry towel or terry cloth, tie it up with a rubber band, and slip inside the cover. This is a great way to absorb odors.

If these steps don’t help, replace the beans! You might be pulling your hair out wondering how to clean a bean bag chair that won’t smell good no matter how hard you try but fresh filler beans inside might be the answer.

How to Keep Your Bean Bags Clean (7 Tips)

Once you’ve got your bean bag clean, you’re going to wait to keep it that way:

  • Save yourself most of the work and use a vacuum on your bean bag chair regularly. A lot of marks could just be crumbs and dust.
  • Warm, soapy water and a damp cloth are your new best friend for most materials. Don’t forget those circular motions!
  • Don’t let spills dry. Tackle them immediately with your trusty damp cloth so there’s less chance of staining.
  • Stay on top of odors is half the battle. Freshen up those beans!
  • Invest in brushes for suede and velvet.
  • Never wring water out your materials: drip-dry then air dry.
  • Use a leather conditioner to keep your luxury bean bag chair in tip-top condition.

Conclusion

By now you’ll be fully equipped with the information of not only how to clean a bean bag chair, but how to keep it looking and smelling fresh for years of squishy comfort!

Sustainable Furniture

How to Keep Furniture From Sliding on Wood Floors

Learn five methods for stopping furniture from sliding on wood floor and laminate

How To Stop Furniture From Sliding Featured

Is your furniture sliding on your vinyl floors or hardwood floors? Are you constantly readjusting your living room couch or chairs because its moved across your floor, again? This issue is not only annoying, but the hard furniture legs and feet could damage your nice hardwood floors or laminate.

This is a common problem for many homeowners, but there are many methods you can use to keep your furniture in place:

To keep your furniture from sliding on your hardwood floor, you can should use DIY furniture grippers, rugs, rubber pads, feet pad covers, or stop blocks. These will keep furniture in place, protect your hardwood floor, and stop furniture from slipping out from under you.

Using one or more of these methods, it’s easy to stop furniture sliding and prevent those furniture legs from making marks on your floors. Let’s take a look in more detail.

How to Keep Furniture From Sliding on Hardwood Floors: 5 Methods

Let’s consider a few options on how to keep your furniture from sliding and damaging the flooring.

1 – Stop Sliding Furniture With DIY Furniture Grippers

This DIY option is a great way to stop furniture from sliding across your hardwood floor. You can make your own furniture grippers for any furniture leg using easily available materials. These grips are little pieces of a non-slip material that are put under the feet to prevent sliding.

  1. Put a piece of card under the foot and trace around it. Cut this shape out to make your template at the right size.
  2. Get some non-slip drawer lining mesh (like this super-grippy Gorilla Grip liner available at Amazon) then utilize your template to cut the pieces to the right size.
  3. Pop the homemade furniture grippers under the couch legs, or whatever furniture you want to stay put. If the furniture is something you intend to keep in place for quite a while, this is a good, quick option. There is no need to glue the material to the foot as you won’t be sliding this piece of furniture around often.

This method isn’t recommended if you frequently move the piece around, as you’d have to replace it under the legs each time.

2 – Utilize a Rug to Prevent Your Couch From Moving

A rug is an easy way to decorate your living room and prevent the furniture from sliding at the same time. An area rug is great for furniture that is close together, like the couch and surroundings. Perfect for laminate floors too!

An area rug, or rugs placed wherever you need them, provides a small section of carpet which is normally enough to stop furniture from slipping. However, if the furniture is not that heavy, or you have super slippery hard floors – the rug could slip too!

If you have a slippery rug because of the hardwood floors, it might be necessary to add a rug pad. This is a grip material, often rubber, that goes discretely under the rug to keep it in place. An area rug with your couch and others items on it will likely stay put from the weight without this.

Of course, a rug can be a good option to use for adding some texture, color, or even comfort to the hardwood floor in addition to keeping the furniture pieces where they should be. This is the most expensive way to stop furniture moving, but the added aesthetics of an area rug or rugs may make it worth it to you.

3 – Prevent Sliding Furniture With Rubber Pads

Furniture grippers are sit beneath the legs of your furniture to prevent sliding. Store-bought alternatives are typically rubber pads, and can provide a long-lasting solution. Some rubber pads will not need to be attached to the couch, you just place them under the legs. The rubber has enough grip from the couch weight to keep them in place. Others rubber pads will attach to the feet so you don’t need to worry about them sliding off. Before getting your furniture grips, measure how big the feet that need a gripper to make sure you choose the right size. You might not want the furniture grippers protruding out the bottom of the sofa, so getting the size right can ensure it looks discrete. There are many options available, but we love the Ezprotect Chair Socks (Amazon) – these cute and effective ‘socks’ for your chairs look amazing! If you’re looking for just standard rubber pads, these X-Protector Grippers (Amazon) will do the job, and come in a range of shapes and sizes.

4 – How to Keep Furniture From Slipping With Feet Pad Covers

Feed pad covers, like these Silicone Chair Leg Protectors (Amazon), are like little silicone feet for your chair legs. They come in different shapes and sizes, including square or round, to fit your chair legs. They can often be purchased quite affordably in sets so you can put feet on all the chairs and get a pack for the tables legs too. As they come already in a set size, it is extra important to measure all the feet first. These feet covers are an affordable option for item that are moved around a lot and have accessible feet. For the bigger items, like a couch, furniture pads (see above) might be better suited.

5 – How to Use Stop Blocks to Secure Furniture Legs

Stop blocks are all in the name- a block that stops the couches and other pieces from moving. You can buy stop blocks or create your own at home. Put the block between the wall and the feet of the furniture to prevent it from sliding into the wall. This is a good thing for larger chairs or a couch that sits near a wall.

6 – Dust Your Floors Regularly

Dust is not a friend to wood floors. It can also be unhelpful to furniture pads too and your efforts to prevent wood furniture moving. The dust can make the hardwood floor more slippery and keep your furniture sliding around every time you use your furniture.

If dust is under the furniture legs where you have rubber pads or grippers, it could cause the products to break down faster, or the furniture leg to slip off the gripper. If the pads have been attached to the furniture leg, the build-up could cause the pads to unstick over time.

The more often you clean the dust from your wood floor, or even laminate flooring if you’re having issues, the less chance of these sliding furniture.

Do felt pads keep furniture from sliding?

Felt pads do not stop furniture from sliding. They are designed to protect your floor from scratches, not to stop furniture from moving.

How do you stop a rocking chair from moving across the floor?

To stop a rocking chair from moving across the floor, either place it on a rug or carpet or glue a grippy material, such as non-slip drawer lining mesh, on to the bottom of the rockers.

How do you keep furniture from sliding on carpet?

If the weight of the furniture is not enough to prevent the rug from moving (and the furniture with it), you’ll need to invest in a rug pad. A rug pad will help the rug stay in place on your floor.

Conclusion

It’s worth taking the little bit of effort to stop furniture slipping  as it will protect your hardwood floor or laminate floor. As you’ve seen, the solution can be as simple as adding a furniture gripper to the dining room table or couch.

Pretty much any furniture legs can be helped by the kinds of furniture grips mentioned above, although you may need to invest in a more substantial solution like a block stop or the carpet cushioning of a rug to stop the big like the couch from moving.

Overall – you can prevent furniture from slipping on a hardwood floor and once the rubber pads or the like are set up, you can relax.

Sustainable Furniture

How to Keep Cats Off Furniture

Learn how to keep cats off furniture with these kitty-approved tips and tricks!

How To Keep Cats Off Furniture Featured

We love our pets; nothing can be better than a cuddle with your pet cat, particularly after a long, stressful day but there are some places we just don’t want them to go!

Whether it’s because you have a brand new leather furniture they’re using as their own personal scratching post, their shedding is getting you down, or there’s a new baby in the house, there are times when all pet owners would rather keep their cat off the furniture or kitchen counters altogether.

As we all know, achieving that is easier said than done.

Whatever the reason, if you’re looking for how to keep cats off furniture, you’re in the right place. We’ve got loads of tips and tricks that can help you deter or even train your cat from jumping up onto furniture you’ve declared off limits.

p.s. have grubby paws left your couch in need of a clean? Check out our ultimate couch cleaning guide.

Seven Tips For Keeping Cats Off Furniture

1. Start Training Your Cat To Stay Off Furniture When It’s Young

Training a new behavior is much more effective when introduced as early as possible. A younger cat is more likely to take training on board, but whatever the age of your cat you should introduce your new rules and stick with it.

If you have a new kitten you don’t want on the bed or couch, then don’t bring them up onto the bed or couch! If they’ve never known any different, then your kitty is less likely to be too bothered by the lure of this piece of furniture.

Training your cat with treats and a command in a firm voice is a great way to start enforcing a behavior. Every time the cat jumps on to your furniture, place them back on the floor. Resist the urge to give in, no matter how long it takes.

Now, this approach alone has a good success rate with dogs, but cats are a breed unto themselves. Their independence and defiance are what we love about them, but it means they don’t respond all that well to training in the form of a reward or command. Pet owners often need to use one or more of the other tips listed below in addition to this one to get the training to stick.

2. How To Keep Cats Off Your Furniture By Giving Them Their Own Space

Indulgent? Perhaps. Effective? Yes.

If a pet has their own designated space, they’re much more likely to treat that as their own place of comfort, rather than coming to pester you for a little room on the couch. When a cat has their own areas, covered in their own scents and littered with their own cat toys, they’ll always choose to go there as a preference.

A cat scratching post base with a perching area on top is often all your feline friend will need (apart from a cat bed). Cats like their own space so cat parents should encourage this. To lure them to their new home, place catnip on their furniture, or other scents they like (try lavender and thyme) and they’ll soon be drawn to it.

Have scratch posts and toys ready when you first bring your kitten home, so they grow up knowing these items are theirs, and will be used to using them.

3. Stop Cats Scratching up Your Furniture By Getting a Scratching Post

Scratching posts are important products because not only do they keep your cat entertained but they’ll help file down those sharp claws that have a habit of putting holes in your clothes, too.

Scratching is an instinctual part of a cat’s routine. A cat scratches to relieve boredom and to file their claws. It’s a way for your pet to flex their muscles, to leave their scent, and to relieve stress. When it’s mating time, scratching is a way for a cat to release pheromones on surfaces, because there are scent glands in their paws.

So, instead of scratching furniture, cats will do much better with their own scratching post. Get a good quality one and if it helps, add strips of fabric, upholstery, cardboard, and other scratching surfaces to keep them entertained. Personally, we’re suckers for this fun Catcus Cat Scratching Post Tree by Luckitty (amazon), which comes with a play ball and bed.

Of course, you don’t need to buy a scratching post (although some of them look awesome), some pet owners have success with carpet cut-offs. Carpets are a favorite scratching item so by placing carpet runners in strategic areas you can stop your cat from scratching more precious items.

4. Find Your Cat’s Weakness And Exploit it To Keep Them Off Furniture

Cats are smart, so knowing how to keep cats off furniture can be as much a mind game as anything else. Find out what they hate.

For example, some pet owners swear by a spray bottle filled with water. Working on the premise that cats don’t like water, a squirt from a spray bottle could be enough for them to jump down from the furniture or kitchen counter top. Some cats don’t even need the spray any more: simply seeing their cat parents reaching for the squirt bottle is enough.

If your cat waits for you to leave work before they hit the furniture, try a motion sensor that emits sprays when it catches the offender jumping up. It sounds like overkill, but it’s either that or deal with claw marks on your new sofa! Check out high-tech this PetSave Pawz Away Pet Barrier (amazon) – it works by emitting warning noises and then a static correction when your pet approaches the device.

5. How to Keep Cats Off Furniture with Scents

If they simply roll their eyes at you in disgust at the spray method, then its’s time to up your tactics. Pet stores stock commercial cat repellent spray, which cats hate but that doesn’t offend human noses. We recommend the SEGMINISMART Cat Scratch Spray (amazon), it’s safe (made from plant extracts), smells of citrus (which cats hate, but most pet owners like), and is suitable for furniture, drapes, counter tops, and other places you don’t want your cat to go. A couple of squirts of that on the furniture could help.

There are also some other scents that cats hate. Most cats are not fans of citrus aromas, or spicy scents like curry or cinnamon, so you can make up your own cat repellent spray with essential oils dripped into water and then sprayed onto the furniture you’re trying to deter them from.

It’s important that you don’t get any of these citrus or cinnamon oils anywhere near the places the cat needs to be. Don’t spray near the litter box, their scratch posts or on their toys.

If one particular smell doesn’t deter your cat, then try another. Your own cat might love the smell of lemon but hate orange. They might not be put off by citrus at all, but detest mint. There’s no need to invest in expensive products, because you’ll probably find ingredients in your own cupboards that you can use. Keep experimenting to find something that works.

6. Use Sensation to Deter Your Cat From Jumping on Furniture

Cats are primal hunters, and so they’re in tune with their environment around them. Cats are very fussy not just about smells, but about the things they can feel with their sensitive paws.

They often hates smooth and shiny surfaces, for example, because they can’t get purchase with their claws so they feel unsafe. Sheets of aluminum foil stretched across your kitchen counters will keep cats from jumping up more than once.

As much as they detest the feeling of aluminum foil, cats also hate anything sticky. Try double-sided tape in the areas you don’t want them to jump up onto. Clear double sided tape won’t even be noticed by guests and they’ll simply wonder where on earth you found such an obedient cat who doesn’t jump up onto the furniture.

As much as your cat likes carpets, they hate the underlay underneath. So turn carpet runners upside down and place near items you want your cat to stay away from. Other sensations cats dislike are sandpaper and sheets of plastic, all of which can be found at your local home improvement store (along with the previously mentioned double sided tape). There are also purpose-made plastic floor mats that are made to deter cats, such as this Homarden Cat Repellant mat (amazon) – it’s designed for outdoor use, but you could use it indoors in a pinch.

7. How to Keep Cats Off Furniture With Noisy Traps

Stealth is a cat’s best friend; cat owners can stay one step ahead in their quest to keep cats off furniture by making a trap that will scare them. Something as simple as a small plastic bag filled with pennies and hidden under a cushion can stop your cat from wanting to get onto the furniture.

When training your kittens to stay away from furniture, a sharp blast on a whistle may also help. Associating the unpleasant noise with the item of furniture can be enough to keep cats away as they grow older, too.

Again, a motion sensor that beeps might do the trick. Sudden noises go against a cat’s instinct to be as quiet..

Two Things You Should Not Do When Trying to Keep Cats Off Furniture

Frustrated cat owners will do anything to know how to keep cats off furniture, but that doesn’t mean every method they try is a good one. You want your cat to know to stay away from the furniture but also to be happy in its home.

Don’t Get Mad

You should never scare your cat off the furniture by hitting them, kicking them, or yelling at them. If one of the earlier suggested methods doesn’t keep cats off furniture, try another, without resorting to violent behavior. It can be frustrating, but owning a cat means providing cat care for life, even when it’s hard work.

Don’t Remove Your Cat’s Nails

If your cat continues to scratch and cause damage, get them a scratch post and their nails will naturally file down. Cats scratch, and you can’t change that, but you can find ways to train your cat to channel the scratching into a less destructive area. De-clawing cats is an agonizing and permanent procedure that maims a cat, and not just physically.

You can invest in some covers for their nails, so they don’t damage surfaces or furniture. There are ways to get cats to stop destructive scratching without resorting to surgery.

Often, a cat scratches because it’s bored. If it’s safe, let them out in the garden to explore. It’s much better for them to scratch up a tree than up your couch.

Stick with the Plan!

Knowing how to keep cats off furniture is something cat owners have struggled with for many years but eventually your cat will get the message!

Whether it’s knobbly floor mats, repellant sprays, noisy tricks, double-sided tape or simply investing in some nice wooden cat furniture such as a cat tree, you’ll find the best way for you to keep the cats of your house away from the furniture – all it takes is a little bit of experimentation.

When you’ve cracked the code of how to keep cats off furniture, be sure to spread the word so other cat lovers can benefit from the tricks, too!

Avatar photo

James Evans

James is a copywriter based in the UK. He writes on sustainability, finance, tech, and anything else that interests him. He likes tea.

Sustainable Furniture

How to Keep Couch Cushions From Sliding

Learn 8 easy solutions for sliding couch cushions

Stop Couch Cushions Sliding Around Featured

Are you sick of having to get up from a comfortable position to push your sofa cushions back to their proper place? Do you find that the process of simply coming home and putting your feet up is interrupted by the need to constantly re-align your escaping cushions?

A sliding couch cushion can drive you up the wall. But have no fear, because there’s a solution! In fact, there are several, so let’s take a look at a range of tips and ideas to keep your couch cushions from sliding, so that you can get back to your favorite TV show in comfort.

How to Keep Couch Cushions From Sliding Off: 8 Methods

1 – Use a Rubber Carpet Underlay

This is the easiest and the cheapest solution of all, and also the one that’s the least invasive. Rubber underlay is non slip rubber lining that normally goes under carpets, but it’s also a quick and easy way to stop cushions sliding forward. These are easy to find: any store that sells carpet will also sell rolls of underlay, and a couple of pieces will cost you just pennies. Just slip it underneath the cushions or leather seats and you’re set – it’s a quick fix, but it works.

2 – Use a Rug Pad

A rug pad is similar to carpet underlay, except it is usually used under a rug on a hard floor to prevent the rug from slipping. The same grip that stops the rug sliding will help prevent your sliding cushions from disappearing from underneath you. As you’ll see below, there are specially designed rubber pads that are made for couches, but there’s no real need to pay for these if you have a spare rug pad or carpet underlay (above) to hand.

3 – Stop Sliding Cushions With a Shelf or Drawer Liner

You can try a rubber drawer liners. These are liners made from such fabrics as vinyl, soft plastic, or rubber and are another inexpensive solution that means you don’t need to attach anything to your cushion.

The best type of shelf liner is one that’s perforated to give more adhesion. You can easily cut the shelf liner to the size and shape you need, which should be slightly smaller than the cushion itself so it doesn’t poke out from underneath. The great thing is that this kind of material comes on a large roll, so it’s easily replaced if it becomes worn down after a period of wear.

4 – Use a Specialist Non Slip Mat For Couch Cushions

These specialist commercial solutions provide a similar function to our DIY solutions above, and like them they should work without needing to attach anything to the cushions themselves. Although these cost more, the advantage is they tend to be a bit more durable than the options above (which may not be made of such high quality materials) and some solutions come in specific sizes that will fit your couch without the need for modification.

One good option is the Gorilla Grip Couch Cushion Gripper pad (amazon) which comes in multiple different sizes to fit couches and armchairs. You might also want to try TEUVO non slip pads, which come in a roll which you can cut to whatever length you desire – although these do come with an adhesive to stick them to the seat cushions.

5 – Try Velcro Strips

One of the most foolproof ways to stop couch cushions from sliding is to use velcro strips underneath your seats. If you apply strips of velcro to the sofa itself, then the corresponding velcro to the underside of the couch cushion, you can keep the cushions secure on the sofa with very little movement, as the hook of one side catches the grip of the other and holds the cushion secure.

It’s not a choice that everyone will go for, because it involves attaching material directly to the cushions with adhesive. This could be a problem when it comes to cleaning the covers of your couch cushions. It also means that you’ll be unable to flip your couch cushion regularly, as there’ll be a velcro strip attached to it.

For ease of use, make sure you get velcro strips that have adhesive on the back, rather than those that require sewing on.

6 – Combine Non Slip Pad & Velcro Strips

The non slip mat might not fix the issue if the mat itself slides out from underneath the cushions. If this is the case, try a combination of the above solutions, by attaching a non slip pad to the couch with the use of a strip or two of velcro, and then placing the cushions on top.

This way, there’s no adhesive on the couch cushions themselves, but by using both velcro strips and non slip mats, you’ll be doubling up on your options and practically demanding that the cushions stay in place and refuse to move!

7 – The Hook and Ring Option

This idea is one that involves a little more work and also requires the ability to sew, but it’s very effective. If you’re feeling confident in your DIY skills, take the cushions off the sofa first, and then sew a piece of fabric to the seat. To that piece of fabric, attach a furniture ring. Then, sew another piece of fabric to the cushion, and to that piece, attach a blunt hook. Depending on your cushions, you may be able to use a sewing machine to achieve this, but you’ll need to sew the part that goes on the seat of the couch by hand.

By hooking your cushions onto the couch, you can anchor them in place and stop the couch cushions from sliding, but it’s a technique that involves sewing directly onto your upholstery, and so won’t work for sofas and couches made from leather. The solution is quite easily removable if you need to wash the covers – just take the hooks and rings off (you can leave the extra fabric attached to the seat and cushion on).

Important: make sure the hooks you use are blunt so that you do not damage a cushion or another part of your couch.

8 – How to Keep Couch Cushions From Sliding Using a Couch Cover

It might sound like overkill for the sake of some rogue couch cushions, but a couch cover could really keep your cushions in place. Couch covers come in all fabrics and designs, so you’re sure to find one that works for you.

A stretchy, slip-on couch cover that fits around your couch and is pulled tight with the use of drawstrings will hold your cushions to the couch without giving them room to move.

Couch covers aren’t only effective at preventing cushions from sliding, either, but they’re a great idea for keeping your whole couch protected from damage such as spills, stains, and regular wear and tear.

Conclusion

By now you’ll have plenty of information to consider, so you can decide on the best solution for sliding couch cushion problem.

The best advice we can give you is to start with the least invasive option first, and then work your way through each step at a time if you’re getting the desired result. So, first try to get hold of a non-slip mat and see if that works. If not, move up to the velcro method, then try a combination of the two before looking at other options.

Whichever one you choose, you’re sure to find that your sliding couch cushion is soon no longer an issue, as you show your cushions who’s boss!

Sustainable Furniture

Can You Lay a Fridge Down to Move or Store It?

Learn why manufacturer's recommend you never lay your fridge down and what you should do if you absolutely have to.

Can You Lay A Fridge Down Featured

There’s no two ways about it, moving a fridge or fridge freezer is hard work, especially if you’re moving it yourself rather than using professional removers. Yet the simple act of laying the refrigerator on its side or back to move it could be causing critical and expensive damage.

Most manufacturers recommend you store and transport a refrigerator in an upright position rather than laying it down on its side. When you lie a fridge on its side, oil leaves the compressor, which can cause damage if the refrigerator is turned on before this is corrected. The risk is higher for older refrigerators because the oil will have more particles in that could cause damage.

So, why is it so bad to lie your refrigerator down? What do the manufacturers say about it? And what should you do if you absolutely must lie your fridge down? Read on to find out more!

What’s Wrong With Lying a Refrigerator on its Back or Side?

So why do manufacturers recommend that fridges remain upright? Well, it turns out there are quite a few reasons:

  • When a refrigerator is laid down, oil that lives in the compressor can flow into the coolant lines and they can get clogged.
  • Refrigerators rely on compressors to move refrigerant through the system. The oil in these compressors act as a lubricant, and are critical to ensure they work correctly right. If the compressor is turned on without enough oil inside it can seize up – just like a car engine that hasn’t had its oil topped up.
  • A refrigerator laying on its back is at the greatest risk of damage because this area houses the most fragile parts. Move a refrigerator immediately if it is ever on its back – being on its side is almost always preferable.
  • If oil gets into the parts of the compressor where the refrigerant should be, the compressor will attempt to compress it. This will likely break the compressor, because oil does not compress.
  • Refrigerators are designed to transported standing upright. This means they are built to withstand any bumps that may occur during transportation while upright – but turning them on their side makes these bumps affect them on a different axis where they may not be as strong. Basically, they’re more likely to break!
  • Over time, small bits of dust and dirt get into the oil (mainly through wear and tear of the compressor). For older refrigerators, there is a greater risk of the oil causing damage when it gets into the compressor line or cooling line.

What Do Fridge Manufacturers Say About Keeping a Refrigerator in an Upright Position?

Many refrigerator manufacturers provide little general information about whether you it is safe to move a fridge in any position other than upright.

The one company we could find with general information was GE Appliances, who state that it is best to keep the refrigerator upright to minimize damage to the sealed system. In particular, they say that French-door, bottom-freezer, built-in models, and compact models must always be stored and moved in an upright position. Top-freezer models can be laid down if absolutely necessary, in which case they should be laid down on the side opposite the hinges, and side-by-side models should be laid down on the freezer side (source: GE refrigerator moving instructions).

If your manufacturer does not provide specific written instructions and you are unsure, we suggest you either contact them or keep the fridge upright (better safe than sorry).

What Should I Do If I Have to Lie My Fridge Down?

If you do have to lie your fridge down, follow these guidelines:

  • Most importantly, leave the refrigerator unplugged and standing for at least as long as it was lying down. This allows the oil to flow back out of the cooling lines to where it should be. So if you leave it lying down for more than a day, you’ll want to leave it standing up but turned off for a similar amount of time. We recommend even if it is on its side for just a few minutes, you leave it standing for at least two hours before starting it up.
  • Check your manual, some manufacturers give guidance on how to lie your fridge down. Depending on how the compressor lines are situated, one side may be preferable to the other. The best way is so that the compressor tube is standing upright so that the compressor lines are going up. Consult your manual or ask your manufacturer if you are unsure.
  • Never lie a refrigerator down on its back, not even for just a few minutes. Unless your user manual says otherwise, lying a fridge on its side is always preferable.
  • If you can’t keep it stood upright, at least try to lie it so that the top end is higher than the bottom. This will prevent oil moving out of the compressor.
  • Lay the refrigerator on its side gently and use a blanket covering (or something else soft) to cushion any bumps that may happen.
  • Return the refrigerator to a standing position as soon as possible.

The Best Way to Move a Fridge in a Vertical Position

The safest method to move a fridge is to use a technique that enables it to remain upright. Lifting the fridge manually in this position is extremely difficult, so we recommend you use a hand truck to move it. If you’re transporting it any distance, the best way to do that is with a moving truck with a lift gate so that you don’t need to tilt the refrigerator on its side at all.

Before you move it, you should remove all the food and either remove or secure loose items such as the ice storage bucket, ice trays, glass shelves, and storage pans. Don’t forget to check it is unplugged from the wall outlet and keep the doors shut and properly secured and so they can’t swing open (you may wish to tie them shut).

How long can a refrigerator lay on its back?

Do not lie your refrigerator on its back for any length of time. The most fragile components, such as the compressor, are at the back, and putting weight on them could cause damage. Transport your refrigerator standing up if possible, or on its side if you have to.

What happens if you don’t let a fridge settle?

Letting a fridge settle allows any oil that has come out of the compressor to return to its correct position. Failure to do this could cause the cooling lines to clog or cause damage to the compressor (either through lack of oil, or oil in the wrong place).

How do you transport a refrigerator in a pickup truck?

Load the refrigerator upright using a dolly and place it upright against the cab wall. Use ratchet straps to anchor it securely and ensure it cannot move when driving. Do not lie the refrigerator down because this can damage it.

Sustainable Furniture

Should You Put a Rug Under a Dining Room Table?

Is it really practical to put a rug under your dining room table? Find out our views inside

Rug Under Dining Room Table Featured

So, rugs under the dining room table? Or are dining rooms better off without a rug? Below you’ll find the pros and cons of rugs in your eating space, followed by some guidance on what kind of rug will go well under your dining room table and which size will fit your table, should you choose to go with one.

Advantages of Dining Room Rugs

There are many advantages to adding a rug:

1. A Dining Room Rug Can Pull a Room Together

Rugs have more ability to pull a room together than you might think. The splash of color they add to the room can complement a wall color or your dining room furniture and add an extra decor element. Patterned rugs, for example, can be used to complement the rest of your interior style. Done right, your rug look can tie the whole design scheme together and add an extra touch your room may otherwise have been missing.

2. A Rug Under Your Dining Room Will Make Your Room Cosier

If you have a large dining room, adding a rug can make the room feel less open and make guests feel more cozy and content. Speaking of cozy, it’s always nice to feel warmth and comfort under our feet, so why should it be any different while we’re eating a delicious dinner?

3. A Rug Can Help Differentiate Areas In Mixed-Use Rooms

Separate dining rooms are a real treat, especially if you love to entertain, but we’re not all that lucky. A dining area rug can clearly mark out the dining area, separating a dining space from a living room or kitchen area in your home.

4. A Dining Room Area Rug Can Protect Your Carpet

If your dining room is used regularly and you have a less durable carpet, a rug can protect your dining room floor from the wear and tear that table and chair legs can create as they get moved back and for over it.

Disadvantages of a Dining Room Rug

There are also a few downsides that may be enough to convince you to go without a rug:

1. You Need To Move Your Table To Clean Your Rug

If your dining table is very heavy, just getting the rug underneath it could be a pain. Having to make sure the rug is always in the right spot underneath the table could be tough, too. And as for moving the table out of the way to clean any stains… we hope your table isn’t too heavy.

2. Dining Room Rugs Will Need Cleaning More Often

A dining room area rug is one more thing that needs cleaning. Spills and stains are to be expected at dinner parties, and there’s no doubt that running a mop over a wood floor is so much easier than getting on your hands and knees and scrubbing gravy out of a fluffy pile. You may want to think twice if you have small children in your home!

3. A Poorly-Sized Rug Will Interfere With Your Chairs

If the rug is the wrong size, it can interfere with your dining chairs and cause an uneven sitting surface (front legs on, back legs off), which people will likely find uncomfortable.

Tips For Choosing a Rug For Your Dining Room

When choosing a rug, you’ll want to keep a few things in mind:

  • Style – go for a style that fits in with the rest of the room. Think about the overall effect the space has so that your rug compliments not just the background color scheme but the room shape, too.
  • Shape – It’s important to match rug shape with table shape, as otherwise the effect won’t be easy on the eye. Consider a round rug for a round table, and so on. It sounds simple, but shapes add texture to a room as much as any material or wallpaper design does.
  • Material – A rug in your dining room will get a lot of wear and tear. The weight of the table, movement of the chairs and other furniture, and the regular vacuuming it may need, mean it may need to be tougher than rugs in other areas of your home. Choose something hardy.
  • Low Pile – A shorter pile will help prevent tables and chairs from getting caught up on the rug.

What Size Rug Should Go Under a Rectangular Dining Table?

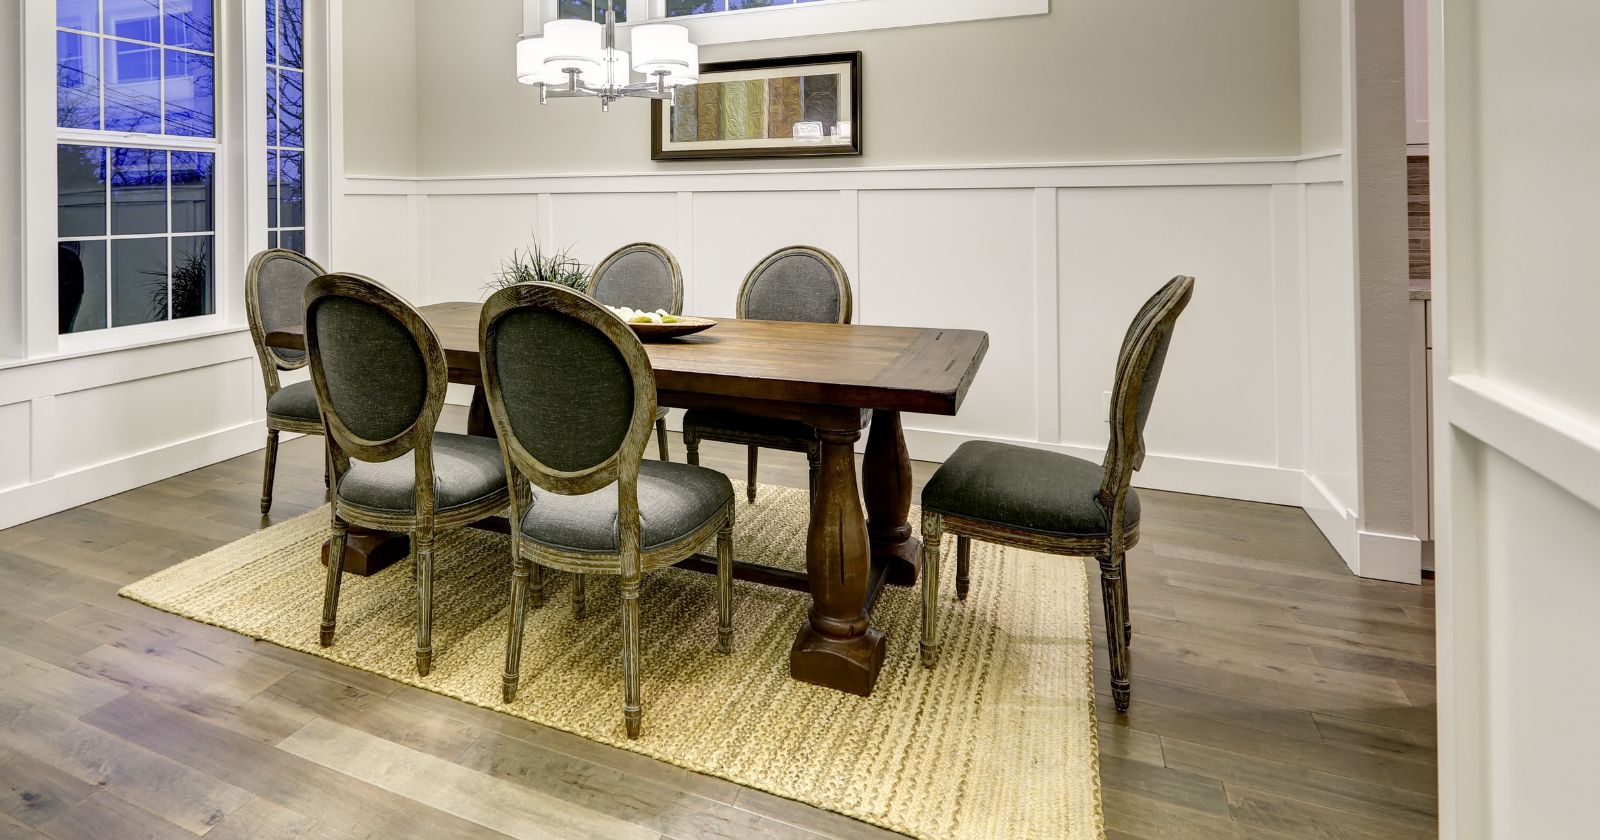
As a general rule, if you are placing a rectangular rug under a similarly-shaped dining room table, you will want a rug that is at least 45cm (18″) up to 60cm (24″) bigger on each side of the table. This extra room is necessary so that people can pull out their chair without it getting caught on your rug.

This rug size will also give enough room for someone to sit on the chair and have all four chair legs on the rug. This is important because if the two front legs of the chair are on the rug, but the back legs extend past the edge, the chair will be wobbly and uncomfortable. If in doubt, get a bigger rug.

Rectangular Table SizeSuggested Minimum Rectangular Rug Size
30″ x 42″66″ x 78″
30″ x 60″66″ x 96″
36″ x 72″72″ x 108″
42″ x 96″78″ x 132″

What Size Rug Should Go Under a Round Dining Table?

As with a rectangular table, your best bet is to purchase a rug that allows at least 45cm (18″) of additional room around the table, and you may find you need at least 60cm (24″).

This means the diameter of the rug needs to be between 90cm and 120cm (36″ and 48″) larger than the diameter of the table. For example, if you had a new table with a diameter of 60″, you’d need a rug with a diameter of at least 96″ to accommodate the seating arrangement.

Round Table DiameterMinimum Rug Diameter
30″66″
36″72″
48″84″
60″96″
72″108″

What Type of Rug is Best for Under a Dining Table?

For a dining room rug, you’ll want to choose a short fiber rug with a flat weave rather than a fluffy rug. Thick shag rugs look great, but they are not practical for dining tables. They make it tough to pull the table and chairs out, and crumbs will accumulate in the fibers. The wrong rug will make it hard to move furniture and quickly become messy.

In terms of overall look of the rug, it’s going to come down to personal preference. Our choice would be to look at area rugs made from natural fibers with a color or pattern that complimented the decor of the eating area without overwhelming it.

Another great idea is to find matching carpet tiles that you can put together and even replace if you find spills or stains in some areas. Heavy tables can wear down the rug texture after a while, but that’s not a problem if you replace affected carpet tiles. They’re a popular choice in the kitchen for these very reasons.

Sustainable Furniture

How to Remove Mold From Fabric Furniture

Learn how to remove remove mold from fabric furniture and prevent it from coming back

Remove Mold From Fabric Furniture Featured

Mold on your couch or other fabric furniture is not only disgusting, but the mold spores are also related to an exacerbation of health problems such as allergies.

To keep you and your family safe and to prevent further spread, some cleaning is required. Thankfully, this cleaning can be achieved using simply household products. All that is required are common cleaning materials such as a brush or broom, spray bottle, and water. Needless to say, the earlier you clean your items the easier the process will be.

p.s. you might also want to check out our How to Clean a Couch article if your couch (or chair) has other stains on it.

How to Remove Mildew or Mold From Fabric Furniture

To remove mold from furniture you should expose it to fresh air and sunlight, use a brush and/or vacuum to remove loose mold spores, clean using white vinegar, then rub down with diluted rubbing alcohol to prevent future growth. You must then make changes to the area in which the furniture sits to stop the mold from growing again.

Before getting started, we recommend you invest in a mask and some gloves to protect you from the mold spores and any cleaning materials you will be using. Always test cleaning materials on a small, out-of-the-way area of your upholstery before treating the rest of the piece.

Let’s take a look at those steps in detail:

Step 1: Expose Moldy Furnishings to Fresh Air and Sunlight

Taking your furniture outside and exposing the upholstery to sunlight achieves several objectives. First, moving the upholstery to an open area means you are not brushing off mold spores inside your home, something which isn’t safe as it might encourage further spread and actually increase the number of areas that are affected.

Secondly, if you can get the furniture outside on a nice day, the natural light and breeze can help in removing the mold. The sunlight and wind help to remove moisture from your upholstery and create conditions in which it is hard for mildew to survive.

Choose a nice day with no chance of rain or high humidity and place your furniture outside, in the sunlight. If the furniture is too large or heavy to take outside, remove any part or attachment you can, like couch cushions, and clean them outdoors.

If cleaning your upholstered furniture outside is impossible, put down sheets of paper towel or something similar to catch any mess you make. After you are finished you will need to clean up thoroughly and remove any mildew infected materials.

Step 2: Remove The Mold With Brush, Broom & Vacuum

Use a brush to remove any obvious mold from the couch or fabric upholstery. For larger pieces of upholstery, you could also try using a small broom. Once the brush has cleaned the obvious areas, it is time to vacuum. Use the upholstery attachment of your vacuum and clean the fabric as thoroughly as possible.

Once finished, get rid of the vacuum bag used for cleaning the upholstery. If you use a bagless vacuum, spray the inside with a mold-killing cleaner, like alcohol or vinegar, and wipe it down with a soft cloth. Let the vacuum container dry well before using again.

Step 3: Clean Mold With White Vinegar Spray

White vinegar spray is great for cleaning soft furnishings and will help remove the mold from the surface of your couch or cushion. Put white vinegar into a spray bottle and lightly administer across the whole couch or upholstery. Make sure the cloth doesn’t get too damp-just a light spray. Don’t dilute the vinegar spray with water; it needs to be full strength.

Quick Green Tip: Are you looking to use more sustainable cleaning products? Check out ECOSSeventh Generation, and Mrs. Meyers on Amazon for some eco-friendly options.

Step 4: Prevent Future Mold Growth By Wiping Down With Rubbing Alcohol Solution

Rubbing alcohol will help prevent mold and mildew from growing on the surface of your couch or other furniture by killing the spores. Mix equal parts rubbing alcohol and water in a bucket or tub. Use a sponge or cloth to wipe the solution gently over the areas affected with mold.

You want to use the solution where needed while avoid adding excess moisture to the furnishing. Water and moisture can exacerbate mold – which is what we’re trying to prevent. Once you have cleaned the couch with equal parts alcohol and water, let the piece dry in sunlight for as long as possible. If this is not possible, open windows to increase air flow or use a dehumidifier.

Please note: rubbing alcohol could stain some materials. Test a small area with the solution first and allow to dry.-If it didn’t damage or stain it is okay to use.

If the upholstery on the couch or fabric isn’t suitable for this mix, you can skip this step and go to cleaning the upholstery using the white vinegar spray solutions. You might even start with a damp cloth and clean off any area that may have mold spots first.

Step 5: Prevent Future Mold Growth By Exposing to Sunlight and Air

To prevent future mold growth you must make your home environment less friendly to mold. Where possible, increase sunlight in the room and decrease humidity. You may need to open windows more often or invest in a dehumidifier. Vacuuming the couch or furnishings more regularly will also help remove spores. If you do not change the conditions in the room, the mold will return.

What’s The Difference Between Mold and Mildew?

Mold and mildew are often used interchangeably, but mildew is actually just one type of mold, which itself is a type of fungi. Mildew grows flat, is often white or grey in color, and can be fluffy or powdery; it appears on damp surfaces. Mold can be a wide range of colors and textures, and often appears when the damp is more severe. On fabric, mold often looks like little white speckles.

Why Does Fabric Get Moldy?

Fabric gets moldy when the environment in which it is situated suits the growth of mold and mildew. A combination of moistness, warmth, and darkness are key factors; a humid environment is perfect for mold spores. Sunlight, good air flow, and regulating humidity are key to preventing this from happening.

You might think that the upholstery on your furniture doesn’t hold a lot of moisture, but you’d be surprised; humidity and poor home insulation make mold growth possible in many homes. You don’t need water dripping on your material to have a problem; moisture in the air may be enough.

Can Mold and Mildew Be Harmful?

Mold and mildew can be harmful. Many people suffer from mold-related allergies, which can cause symptoms such as coughing, running nose, respiratory issues, and dry skin, and range from mild to severe. A reaction to mold or mildew can trigger asthma and exacerbate other conditions.

For this reason it is vital that you clean fabric with mold on in your home; sitting on mold-covered couch upholstery can damage your health as well as your furniture. To prevent this, clean away any mold you see as soon as possible.

Sustainable Furniture

Do You Tip Furniture Delivery Men – How Much? (Answered)

Tipping for delivery isn't mandatory, but is often appropriate. Read more to find out when you should tip your furniture delivery guys and how much

Should You Tip Furniture Delivery Featured

You’ve paid hundreds of dollars for your new piece of furniture and possibly paid a delivery fee as well, so do you also need to tip furniture delivery drivers?

About 50% of customers tip for furniture delivery, and when they do, the average tip is $10 per person or $20 for great service or a tricky delivery. You should not feel obligated to tip your furniture delivery team, especially for small items, but a $10 to $20 tip is a great way to show appreciation.

So, Do You Tip Furniture Delivery Teams?

Tipping might seem like an unnecessary added expense when you’ve just spent so much on the furniture itself, but it is worth remembering that your furniture delivery drivers are doing a difficult, labor-intensive job, are paid a very low hourly wage, and are unlikely to ever see a dime of the delivery fee you paid.

In fact, it is becoming increasingly common for a delivery driver to be paid per gig, rather than per hour, which means if they take the time to give you a great service, they’re actually reducing their ability to earn! In this scenario, tips are a very welcome bonus that supplements their earnings and encourages great performance.

That said, furniture delivery men (or women) do not expect tips and you should not feel pressured into giving your delivery person one when having your furniture delivered.

P.s. not ordered that furniture yet? You should check out our sustainable furniture guide, packed full of sustainable brands that create great furniture.

How Much Should You Tip Your Furniture Delivery Drivers?

Our research found that most people tipped about $10 per person or $20 for a really good service. A few outliers tipped more, and about 50% of people didn’t tip at all. Because of the cost of furniture, it would be considered excessive to give a percentage-based tip as you might for a meal, although we did find a couple of people who reported doing this!

6 Factors You Should Consider When Deciding Whether to Tip For Furniture Delivery

If you do decide to tip furniture delivery drivers, we suggest you consider the following factors when considering how much to tip:

1. The Difficulty of the Furniture Delivery

Delivering furniture is back-breaking work, but even so, some deliveries are much more difficult than others. If your delivery is particularly heavy furniture or requires a flight or more of stairs, you might want to consider tipping.

delivering furniture in a snow storm
Bad weather? Yep, you should probably tip for your furniture delivery!

Other factors include the steepness of your drive, the tightness of your hallways, and even the weather – would you want to be a delivery driver carrying a solid oak wardrobe in the middle of a snow or rain storm then cart it up five flights of stairs?

2. The Cost of the Furniture

Two guys (or women) just safely delivered your brand new $6,000 couch up your steps and through a narrow and twisting hall without damage to either the sofa or your home. Personally, we’d say that was worth $10 in tips each in appreciation!

3. Timeliness / Punctuality

You’ve booked the morning off work to receive your delivery… and it doesn’t come. An abrupt phone call five minutes after your delivery slot ends informs you they’ll be along in a few hours and you’ll need to wait… yeah, we wouldn’t tip either.

Furniture delivery man delivering a sofa to happy customers
Stress-free furniture delivery – worth a tip?

Being on time isn’t necessarily a reason to tip, but being late and not giving any notice is definitely a reason not to!

4. Assembly

Does anyone really love furniture assembly? If your furniture delivery team assembled your furniture for you, worked quickly, and cleaned up after themselves, you might want to consider that when choosing a tip.

5. Quality of Service

Only you can judge how high the quality of service you received was and if it was worth a tip. However, if your furniture delivery people dumped the furniture through your front door and refused to move it any further, we’d suggest they’re probably not tip-worthy.

On the other hand, if they helped you move your other furniture so you could get your new piece in exactly the right place – and did so without complaint – that might be a different matter. By all means, reward a fantastic delivery service, but don’t feel obliged to tip furniture deliveries and delivery crew who offer poor service.

6. Friendliness & Attitude

A good attitude can go a long way. We tip furniture delivery people who we like.

How Much Should You Tip Coach Delivery?

You should tip for couch or sofa delivery like for any other furniture delivery. We recommend tipping unless you have received poor service, couches are one of the more difficult items to deliver, especially when stairs are involved!

How Much Should You Tip Appliance Delivery?

The average tip for alliance delivery is $10 to $20, but as with furniture a tip is not always expected. However, we recommend always tipping for great service, especially if the delivery is difficult.

A Tip Isn’t The Only Way To Show Your Appreciation

Regardless of whether you tip or not, it’s not the only way to show your appreciation for a job well done. Why not offer them a glass of water, a cup of coffee, or a biscuit? While you’re at it, let them use your bathroom! Little gestures like these are much appreciated by busy delivery teams – possibly more so than a tip.

New furniture arriving soon? You might want to check out our articles about how to get rid of that new furniture smell or our guide to couch cleaning to help keep your new couch looking perfect.

Avatar photo

James Evans

James is a copywriter based in the UK. He writes on sustainability, finance, tech, and anything else that interests him. He likes tea.