Green Home

How to Apply Polyurethane to Your Table

Learn how to add polyurethane to your table to protect it from damage, increase its resiliency, and make it more beautiful.

Applying Polyurethane to Table

Editors note: we are currently assessing whether this article meets our sustainability standards – stay tuned for an update!

Your table sees more than its fair share of action during the day. It’s at the center of your home, and it’s no surprise that it gets its shares of dings and scrapes during every day use. But if shabby-chic isn’t your style, a dinged up piece of furniture may not suit your home.

Applying coats of polyurethane to your dining room or kitchen table will protect it from damage and make it more beautiful. A polyurethane finish provides long-lasting durability and resiliency and keeps your table looking new and fresh even as it gets older. Applying polyurethane is a great way to refresh an old table and give it a new lease of life.

This is a project that even a novice DIYer can take on and find success. By protecting your table you’ll reduce waste by ensuring it lasts longer before you need to purchase a new one. Read on for everything you need to know about applying polyurethane to your table and breathing new life into the centerpiece of your room.

Oil vs. Water-Based Polyurethane

The first decision you’ll have to make when it comes to using polyurethane on a dining room table is whether you’re going to go with an oil-based polyurethane or a water-based polyurethane.

Water-based polyurethane provides tremendous protection with a rockhard, durable finish that is almost crystal clear. It dries quicker but is more expensive.

Oil-based polyurethane gives even more protection but with a slightly milkier finish (it has 45-50% “poly solids” which help create the tough surface). It is cheaper and requires less maintenance because it is tougher.

Most DIYers use an oil-based polyurethane to finish their table. Not only is it cheaper, but the harder finish means you’ll need to do a lot less maintenance on it over the years and your kitchen table will be better protected. If achieving the clearest possible finish is important, then water-based polyurethane is still a good (but more expensive) choice.

Whichever option you choose, the methods and tips for applying that follow will still apply, although you will need to leave longer between coats if you are using an oil-based product.

How to Apply Polyurethane to a Dining Room or Kitchen Table

The overall process for applying poly to a table top is pretty simple and straightforward.

You will need:

  • Sandpaper (you’ll need both rough and fine sandpaper grits)
  • Mineral spirits (that’s white spirit for UK folks)
  • A microfiber cloth
  • Wood filler (for repairing damage)
  • Your choice of oil-based or water-based polyurethane
  • Foam brush (leaves fewer marks than a bristle brush) or a spray gun if you have one

Step 1: Prepare and Repair Your Table

Before you apply polyurethane you will need to prepare the surface of the table by cleaning and sanding it. Begin with a rough grit sandpaper, working your way up to finer sandpaper while sanding in circular motions until you get the tabletop surface as smooth as humanly possible.

If you have to repair any imperfections on the table surface now is the time to do it. Work some wood filler into the scratches or dings (being careful to match the wood species itself) and then sand that away after allowing it to dry, too.

Then you’re going to want to put some mineral spirits onto a microfiber cloth and wipe down the entire table surface, picking up all the dust that would have been left behind – dust that would have caused all kinds of imperfections in the poly finish. Let this dry before you apply polyurethane.

Step 2: Apply Your First Coat of Polyurethane

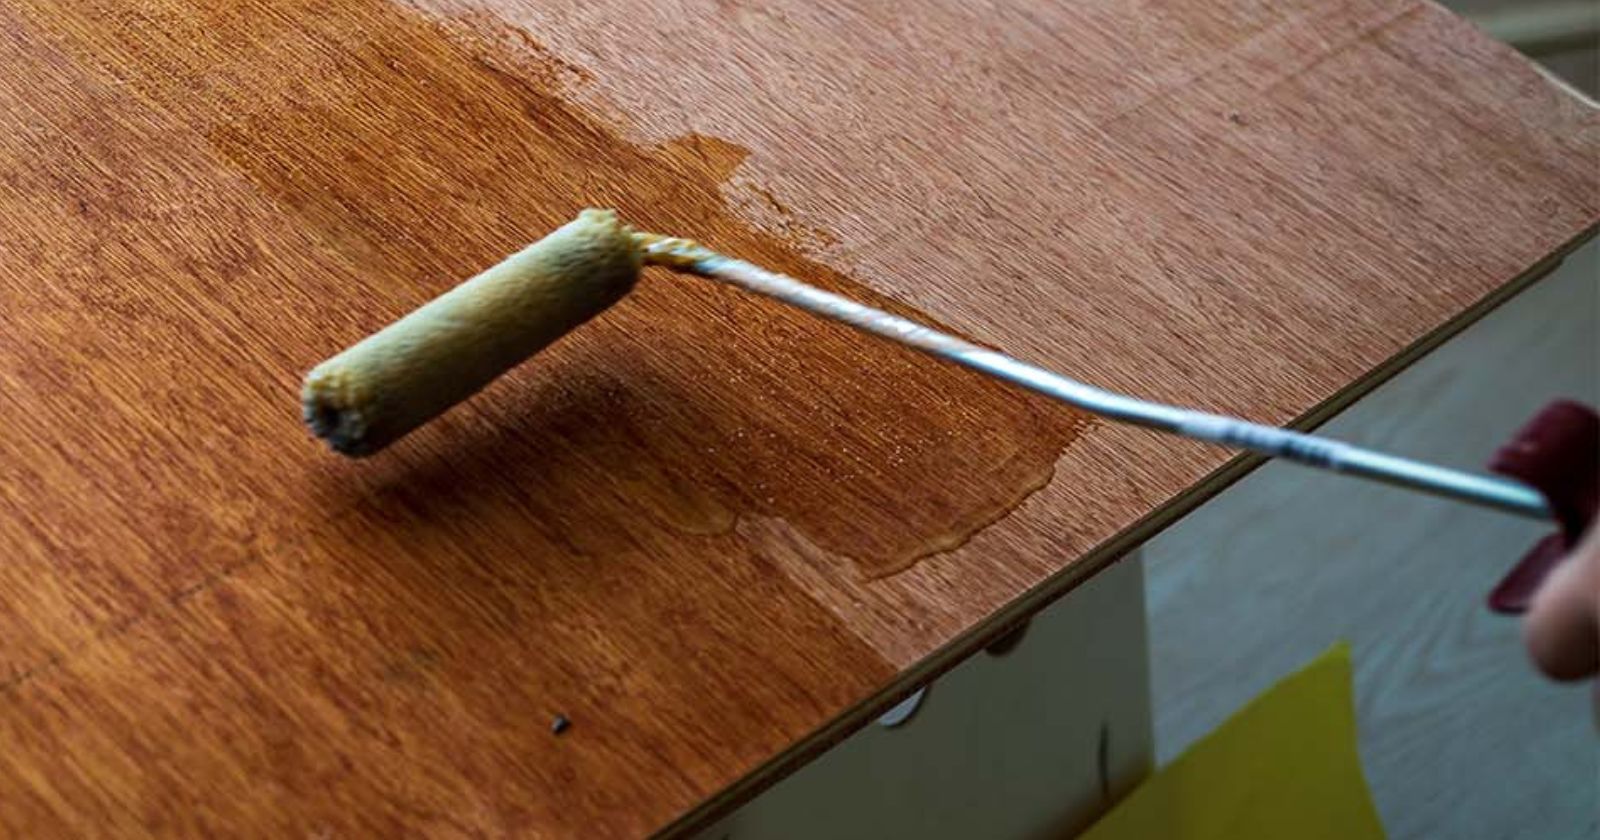
Table prepared? It’s time to start applying the first coat of polyurethane to the kitchen (or other) table. Your initial coat should be a very light, and it’s best if you can spray the finish directly onto the surface – avoiding all brushstrokes completely.

If that’s not possible, invest in a high quality foam brush. Foam brush tools aren’t going to leave behind the kinds of brushstrokes that can be permanent, even if you go for two coats (or three coats) later down the line.

Remember: You want each individual coat to be thin, to have plenty of time to dry and stabilize, and to minimize brush marks as much as possible.

Step 3: Allow the Polyurethane to Dry Completely

If you do not allow the polyurethane time to dry before applying additional coats you will end up with the top and final layer hard, but the layers underneath will still be soft. This will result in a finish that can be easily dented and will not protect your dining room or kitchen table.

Always use as thin a layer as possible and leave plenty of time to dry (check the instructions on the can for the minimum time for your choice of polyurethane – probably 24- 48 hours).

Step 4: Add Additional Coats of Polyurethane

Once the initial coat has dried completely (check your instructions, probably 24-48 hours for oil-based) you’ll want to add additional coats. You’ll get better protection and finish by having many coats of polyurethane rather than one thick one.

First though, you should prepare the surface with some light sanding. You always need to sand before adding an additional coat, not just if the layer is too thick or has small bubbles in. By giving the polyurethane a quick go-over with sandpaper (say, 300 grit) you’ll help the next layer stick to it. When sanding between layers, go with the grain.

Always vacuum or wipe with a lint-free cloth to remove dust before moving to the next step.

Step 5: Finish the Polyurethane-Coated Table With Sanding and/or Wax

Use a fine sandpaper (1,500 grit) to get off any small imperfections or bubbles on the final coat. After allowing the polyurethane time to cure (up to a month), you might want to add wax on the top. This doesn’t add much in the way of protection (the polyurethane is tough enough as it is) but some prefer the look.

How Many Coats of Polyurethane on a Kitchen Table?

A kitchen table should have at least three coats of polyurethane and can benefit from more. Many coats of polyurethane (thin layers) will provide better protection and help your kitchen table to last longer. Some guides recommend a minimum of two coats, but this is unlikely to be enough for an item that gets so much use.

Should You Use a Spray or Brush for Applying Polyurethane?

You should apply polyurethane to your kitchen table using a spray if possible. This is the only way to guarantee that brush strokes never show up in each individual coat of polyurethane (permanently shining through each individual layer). Spraying your finish on to your kitchen table will result in a better result than if you used a brush.

Polyurethane Application Tips

  • If you apply polyurethane over a table with a paint finish it may cause the paint to yellow and you may want to consider other types of finishes instead.
  • When spraying, make sure that you are aware of the width of the spray pattern and tried to “bleed back” into at least half of each coat as you move across the table.
  • Look for wet and glossy consistencies across the entirety of the surface when spraying. If you see any spots that look cloudy or milky, it’s time to go back over them with another jet of finish.
  • When spraying be sure that you are doing so in a well ventilated area; the VOCs put out by this kind of finish can be devastating to your health and wellness. For best protection, always wear a mask that can filter out VOCs.
  • If brushing, make sure that you use a foam brush tool and not the natural bristle options most people use for painting. Bristly brushes may leave visible brush strokes on your kitchen table.
  • Really take your time, especially if you’re using water based finishes as they can leave a streaky finish.
  • Whatever you do, recognize right away that you’re going to have to apply multiple layers and coatings of finish to get the results you’re after. Don’t be impatient.

Conclusion

At the end of the day, the beautiful thing about polyurethanes (when applied correctly, anyway) is that they offer a fantastic protective layer to your furniture in a way that things like shellac, urethane, and traditional paint and stain simply can’t.

Just be sure that you are following the “rules” and best practices of how to apply these coatings (especially when it comes to the first few coats and the final coat) and you’ll end up with a wood finish you will love and depend on for years to come!

Green Home

How to Choose The Best Wood For Your Table Top

Learn how to choose the right wood for your table top, a decision that will effect not only the look of your table, but also its durability and usability.

Best Wood For Tabletop Featured

Choosing the best wood for your table top is a vital step in buying or making your own table. The material you choose will affect not just the look of your table – and how it ties in with your existing decor and design – but also its durability and maintenance.

The right choice of wood will bring your kitchen or dining room alive; the wrong choice might stick out like a sore thumb!

Below we’ve looked at the three important factors you should consider – softwood vs hardwood, traditional vs contemporary, and durability – as well as introducing five popular types of wood (Red Oak, White Oak, Maple, Cherry & Walnut) and why their advantages and disadvantages.

Let’s jump right in!

p.s. Know what wood type you want but not sure where to get the perfect table? Check out our article that showcases beautiful tables created by eco-friendly manufacturers.

3 Factors To Consider When Choosing Wood For Your Table

While you are going to have an almost unlimited amount of options to pick and choose from when it comes to the type of wood you use for a dining table, there are three key considerations you’ll want to focus on more than anything else to find the right choice for your home.

1. Should You Choose a Softwood Table Top or a Hardwood Table Top?

Whether you’re buying or making a kitchen table, dining table, or even restaurant tables, the first factors you’ll want to consider is which wood type you want: softwood or hardwood.

Hardwood species such as oak, walnut, or mahogany, are a better choice for a table top than a softwood. They have a tighter grain structure and are more resilient, which helps them survive the use (and abuse) that kitchen and dining tables receive.

The average hardwood scores much higher on the Janka hardness test (a measure of hardness – more on that on the durability section below) which makes them more durable. There are exceptions, of course – Yew is a softwood but has a high Janka hardness score.

Depending on your usage, this choice may not matter. Pine tabletops (and pine dining room furniture in general) are featured a lot in country style and farmhouse aesthetic designs, and pine is about as soft a softwood as you are going to come across! However, if you do choose a softwood you should be aware it may need a hard finish such as polyurethane to help increase its durability.

2. Style: Are You Looking for a Traditional or Contemporary Table Top?

Another important factor is the style you are going for. Most woods can be used for tables in a wide variety of looks and designs, but some lend themselves to particular styles.

For example, walnut looks amazing in midcentury modern designs but doesn’t really come across quite as well any more traditional or farmhouse style look. On the other hand, hard maple or oak can work for both farmhouse style tables and more modern designs.

Think carefully about the natural aesthetics of the species of wood you’re using and you’ll have a good idea of which style that material is best suited for. It really all comes down to how you use the wood and how it is finished.

3. Tables Made From Hard & Durable Woods Will Last Longer (And Require Less Maintenance)

As a general rule, you’ll want your dining table to be as durable and as resilient as possible. No, you don’t necessarily need a restaurant table that can handle hundreds of people sitting at it on a 24/7 basis, every day of the week, but you do want something that can withstand everyday use – especially if you have a lot of guests or young children.

Like we highlighted above, the wood type you choose for the wood tabletop is going to make a world of difference when it comes to the hardness and resiliency of this piece of furniture. A tight grain pattern guarantees a more resilient and durable tabletop, whereas a more open grain wood species is prone to dents, dings, and scratches. If you are building your own table, another aspect to consider is that you need the wood to be workable. Very hard woods might make your job much harder!

For woods, hardness is measured by the Janka hardness test, which measures how much a piece of wood resists denting. You can see the Janka scores for some woods below to compare hardness between popular woods:

Wood TypeJanka Hardness Score
Red Mahogany2,697 lbf
Hickory1,820 lbf
Hard Maple1,450 lbf
White Oak1,369 lbf
American Beech1,300 lbf
Red Oak1,290 lbf
Black Walnut1,010 lbf
Cherry995 lbf
Red Maple950 lbf
Western White Pine420 lbf

If you need to know the score for more woods, there’s an extensive list on this Wikipedia page.

5 Popular Types of Wood for Table Tops

Below we’ve listed five popular wood types that are commonly used for solid wood table tops. Each of these wood species can create a beautiful table – let’s find out which one is best for you:

Choose a Red Oak Wood Table Top For Durability and a Beautiful Red Hue

Red oak is one of the most popular hardwoods for wood table tops (and it also makes a really nice coffee table, too) in large part because of its hardness and durability.

With a slightly orange or reddish hue (when finished naturally), it’s possible to bring out the “fire” in this material quite easily for a more lively kind of look – all without sacrificing the resiliency of the material itself.

In addition to its beautiful color, its grain pattern is much more open than what you might expect with a traditional hardwood, which allows this material to absorb a lot of stain. That makes finishing it a breeze, though you have to be careful not to go overboard.

This type of wood is a bit on the heavy side of things, though. It’s also best used in more traditional furniture styles compared to more contemporary options.

White Oak Table Tops Are Great For Mission, Midcentury Modern, and Arts & Crafts Styles

White oak (especially quartersawn oak) is one of the most popular materials for wood table tops on the planet. It’s also the most popular choice of wood material for the mission style of furniture, the midcentury modern style of furniture, the arts and crafts style of furniture, and other styles that require clean lines.

The quartersawn approach creates a very unique grain pattern, showing off the growth of the wood itself while still allowing it to maintain strength and resiliency. The grain pattern is also semi-open, allowing it to absorb stains very evenly, too.

Like red oak, though, white oak is very (VERY) heavy. If you make your dining table out of this you might not want to move it around too often!

Maple Table Tops Are Affordable and Durable

Maple wood materials (brown and hard maple alike) have very unique characteristics that make them very high quality options when you’re building a kitchen or dining room table.

The hardness and durability of the hardest types of maple are similar to oak and it has a similar texture and ability to absorb stain quite easily and quite evenly. Soft maple, or brown maple, is less durable (the brown maple is taken from a different part of the maple tree rather than being a difference species), but with a Janka score of 950 is close to the equal of Cherry wood.

Cherry Wood Is a Great Choice For Traditional and Formal Tables

Cherry is a beloved material for both kitchen tables and dining room tables and is the perfect option for more traditional and formal dining room sets. The color is quite warm and rich with a silk smooth texture and a grain pattern that isn’t very disruptive. Cherry wood tables look good when they’re made and typically look better over time.

Durability with this material is a bit more of a question mark, though. Cherry is technically a hardwood but just doesn’t have the same kind of resiliency and resistance to scratching and denting the way that oak, maple, and walnut will.

Walnut Table Tops Go Great With Modern and Contemporary Styles

Walnut wood is top choice for many buyers (and makers) looking for a wood to match with a modern and contemporary style and walnut’s grain pattern is beloved by many.

This hardwood has been used to make everything from spoons and bowls to gun stocks and tables, and everything in between because of its unique characteristics. Walnut has a rare mixture of durability, feel, and a golden glow that comes through the dark surface wood – a glow that really comes alive when finished correctly.

Not quite as hard as oak or maple (the Janka hardness scale of walnut registers at 1010), walnut is still going to resist denting, scratching, and other accidental damage, that come with use. However, the high demand and lower supply (walnut trees grow smaller than some other hardwood trees) for walnut does mean that you will pay a premium for the wood or a piece of furniture made out of it.

Conclusion

Make no mistake about it, one of the hardest things you’ll have to do is sift through all the amazing material options out there to find the right wood. The five species we mentioned in this article are just the most popular choices – there are plenty of others to choose from as well.

If you’re not sure where to start, we recommend you return to our three original factors – you probably want a hardwood, you should choose a wood that matches the style of your room, and you should choose a level of hardness that matches your likely use (and if you’re making the piece yourself, is workable enough).

Avatar photo

James Evans

James is a copywriter based in the UK. He writes on sustainability, finance, tech, and anything else that interests him. He likes tea.

Green Home

How to Measure a Table For a Tablecloth or Skirting

Learn how to measure a round, square, rectangular, or oval table for the perfect size tablecloth or length of skirting. Includes easy formulas + examples.

How To Measure A Tablecloth Featured

There are some skills that we never realize we need until the time comes! And measuring a table in order to get the correct dimensions for the perfect tablecloth is one such skill.

Whether you’re looking for the right size table linens off the shelf, or you’re a little more creative and are looking to make your own, there’s a real skill to getting the dimensions right so that your tablecloth looks perfect.

Now, some of this will look like math…. but don’t worry, it’s easy math. All you need is measuring tape, a little basic addition, and this article to help you get the measurements right for any tablecloth size (or skirting) – regardless of whether your table is square, a rectangle, an oval, or a circle. So, whatever size or shape of table you’re looking to cover, check out the following guide.

(p.s. in the market for a new table? Check out our guide to beautiful eco-friendly tables – good for your kitchen and the planet!)

Need to Know: Overhang and Drop Length

Very rarely will you find a tablecloth that fits exactly on top of the table with no overhang. If you’re measuring for a felt table top protector, then that’s a different story, but for tablecloths and skirting, you’ll want the fabric to hang over the edge.

The distance the tablecloth comes down from the top is called the drop length. You may not know this, but there are different levels of formality associated with the length of the overhang drop. The longer the overhang, the more formal the event or placement in the room.

So, how much should your tablecloth overhang?

For a table that’s been designated for everyday use, a drop length of eight inches is recommended. However, for a formal event such as a wedding or dinner party, a drop length of up to fifteen inches makes a fabulously dramatic statement on a dining table.

How to Measure a Round Table for Tablecloths and Skirting

Tablecloth

If you have a standard table size, measuring for a table cloth is easy. Assuming you want an 8″ drop on all sides, 48″ diameter round table will require a 64″ diameter table cloth. A 60″ diameter round table will need a 76″ diameter tablecloth and a 72″ will need am 88″ tablecloth.

If you need a custom size, or want to vary the drop length, the calculations are straightforward. First, take your tape measure and measure the diameter of the table (the diameter is the distance from one side of the table to the other, going through the center).

To calculate the tablecloth size, take your diameter and add it to two times the desired drop length. We double the drop length because we want it to drop on both sides of the table. For example, if our round tables measured 50″ and we wanted an 8″ overhang, we’d need a 66″ round tablecloth (50″ + 8″ + 8″ = 66″).

If you’re making it yourself, don’t forget to add an extra inch (times two!) of overhang fabric for turning up the edges all the way round. So that’ll be 68 inches in total.

Skirting

Both skirting and tables come in standard sizes. For a 48″diamater round table, you’ll need 13′ or 14′ skirting. For a 60″, you’ll need 17′ skirting, and for a 72″, you’ll need 21′ skirting.

If you’re making your own skirting for a table top that isn’t one of the standard sizes shown above, you’ll need to this is useful to know if you’re measuring up for skirting. The circumference of the table is the number of inches all the way around the table. You’ll need at least that length of skirting plus about an extra foot to give you some slack (more with large tables).

How to Measure a Square Table for a Tablecloth or Skirting

Tablecloth

To measure a square table for a tablecloth For a square table you’re going to want to take the table measurements of the length and width of the table and add double the desired overhand. This will give you the length/width of the tablecloth. For a square, the length and width of the table and tablecloth will be the same.

For example, a table with the measurements of 75 inches by 75 inches, plus a desired drop of 8 inches all the way around, will want a 91″ x 91″ size tablecloth (75″ + 8″ + 8″ = 91″).

If you are buying a square tablecloth you may not find the exact size. An inch difference will not be noticeable. If you’re making it yourself, don’t forget to add an extra inch (times two!) of overhang fabric for turning up the edges all the way round.

Skirting

To measure a square table for skirting you will need to measure from one edge of the table to the other and then multiply this by 4 to get the circumference. If you are only covering 3 sides of the table, you’ll multiple by 3 instead. For example, table dimensions of 48″ x 48″, would result in 192″ or 16′ of skirting required (48″ * 4) for all four sides.

How to Get The Right Size Tablecloth or Skirting for an Oval Table

Tablecloth

Measure an oval table for tablecloth by treating it like a rectangle table. Measure the width and length at the widest points (going through the center) and add double the drop height to each measurement. For example, an oval table that is 50″ long and 30 inches wide at its widest points with a drop of 15″ will need a tablecloth measuring 80″ x 60″ (50″ + 15″ + 15″ x 30″ + 15″ + 15″).

Because of the shape of the oval table the drop will not be even around every side.

Skirting

To measure an oval table for skirting you will need its circumference. If you do not know this, wrap string or something else round the table. mark where it overlaps, and then take it off and measure with a tape measure. You will need this length at a minimum for the skirting to go all the way round the oval table.

How to Measure a Tablecloth or Skirting For a Rectangular Table

Tablecloth

To measure for a rectangle tablecloth you’ll need to measure both the table length and width separately and add double the desired drop for each. For example, a banquet table of length 50″ and width 30″ and a 15″ tablecloth drop would need a tablecloth of 80″ x 60″ (50″ + 15″ + 15″ x 30″ + 15″ + 15″).

It is not always possible to get a uniform drop on every side unless you are making it to fit. Also, remember that some tables are extendable. In this case, you’ll want two sizes: one for when the table is closed, and another for when it’s open. If you’re making it yourself, don’t forget to account for extra fabric for turning up.

Skirting

To measure a rectangular table for skirting you will need to measure along each side you want skirting and add the values together. If a table is 60″ long and 30″ wide, and you want skirting all the way round, you will need 180″ of skirting, or 15′ (60″ + 60″ + 30″ + 30″ = 180″).

Avatar photo

James Evans

James is a copywriter based in the UK. He writes on sustainability, finance, tech, and anything else that interests him. He likes tea.

Green Home

Is Bamboo Really As Sustainable As Big Brands Tell You?

Often touted as a green and eco-friendly material, bamboo isn't always quite as good as brands make out

Is Bamboo Sustainable Featured

Bamboo is a fast-growing material that can be used in the production of many different products, including clothing, fuel, furniture, and food. It is often touted by manufacturers as a green and eco-friendly material – but is it?

Bamboo is sustainable when it is grown organically and used naturally, such as when it is used to make furniture. Unfortunately, many uses of bamboo are not eco-friendly because of the manufacturing processes used.

So, the bamboo toothbrush sitting in your bathroom is probably sustainable because the raw bamboo is biodegradable, but a t-shirt made from bamboo fibers is less likely to be sustainable because it has been chemically treated.

Of course, it’s not just about the manufacturing process. The way the bamboo is mass-produced and grown can also affect how sustainable it is – although, as we’ll see, bamboo can be grown sustainably with little chemical use. Let’s take a closer look at how bamboo is cultivated, harvested, shipped, and produced into ‘eco-friendly’ products:

What is Bamboo?

Bamboo is a tree-like grass that is easy to farm and harvest. There are over 1000 species of bamboo and some variants are some of the fastest-growing plants on earth. It is also one of the few plants that do not require any chemicals to support its growth. That means it can be reliably (and profitably) grown without the use of chemical fertilizers or pesticides, unlike many other natural products.

As well as growing faster, bamboo also converts carbon dioxide into oxygen up to 35% faster than a similar group of trees – although, of course, that carbon dioxide is likely to be released should the bamboo product become waste. It can be found growing in Africa, the USA, Southeast Asia, and Latin America.

Bamboo plants grow slowly at first and take about five years to reach maturity, after which they exhibit that astonishingly fast growth that you probably associate with bamboo. After the bamboo reaches maturity, it can be harvested annually; you only have to plant the bamboo once and then you can harvest it many times. This compares very favorably with woods that might take 30 years to grow and can then only be harvested once.

When is Bamboo Sustainable?

In its raw form, bamboo is considered highly sustainable and a great choice for eco-conscious customers. It grows fast without chemicals, can be harvested every year, and the resulting product is strong, looks good, and will biodegrade once its useful life has ended.

One small negative is that because it is farmed mainly in China and India, there is very little information about how it is grown. It is possible chemical fertilizers are used to speed up the growth, although that is not typically necessary for growing bamboo and so it is not likely.

So natural bamboo is eco-friendly, but is bamboo sustainable once it’s been turned into the products you buy in the shops? The answer is it depends. Any use of bamboo in its natural form is pretty sustainable because of the reasons listed above. This includes furniture and construction uses (check out this extensive guide we’ve created on sustainable construction materials if you want to know more).

However, as we’ll see in the next sections, common bamboo fabric such as rayon is not so sustainable. To create this, the bamboo undergoes significant chemical treatment, making the final product semi-synthetic rather than natural.

Additionally, any discussion of the sustainability of bamboo should include shipping. Most bamboo is grown in Asia. This means it is often shipped to other countries to be used. This is no different from many other products and materials, but does add to the overall carbon footprint of bamboo if you are purchasing it in the USA or Europe.

Is Bamboo Furniture Sustainable?

Yes. When bamboo is used in furniture it is considered a sustainable and renewable material, making it a great choice for eco conscious consumers who are looking for stylish furniture for their homes. Compared to many hardwoods used in furniture, bamboo is quicker to grow and renews annually. It also does not need any pesticides to grow.

Strong and robust, bamboo is often used as a construction material, so your bamboo furniture is likely to last for a long time. Most manufacturers also laminate the bamboo materials before turning it into furniture to further strengthen the end product. With proper care and maintenance, bamboo furniture can last for years.

Bamboo furniture looks good too – it has a fine, natural grain that is simple yet elegant, and can be finished or stained to match other pieces in your home – and best of all, bamboo furniture is relatively cost-effective compared to other materials.

Overall, bamboo is a good choice for furniture. We suggest you stick to brands that not only guarantee the sustainability of the bamboo they are using but also offer fair wages and working practices for the farmers who are growing it.

Are you interested in sustainable furniture? Check out our mammoth sustainable furniture guide for more information, including brand reviews and a buyers guide.

Are Bamboo Clothes Sustainable?

There are two ways to use bamboo to create fabric:

First, you can weave bamboo fibers and spin a thread. This creates what is known as bamboo linen. This process is sustainable; however, the resulting bamboo linen is not soft to the skin or comfortable to wear, and the manufacturing process is also time-consuming and expensive. This process is rarely used, and you are unlikely to see bamboo linen clothing for sale on the high street.

Secondly, and far more commonly, bamboo is turned into a fabric called rayon through the use of one of several chemical processes. These processes are faster, cheaper, and more convenient than bamboo linen and create a better fabric but are also less sustainable. These processes are not considered a ‘closed loop’ because chemicals used in the manufacturing process (including carbon disulfide and sodium hydroxide) are lost into waste water. From there, they enter the environment and cause damage.

Unfortunately, these chemical processes have another side effect. Bamboo’s excellent UV resistance and antibacterial properties – two benefits manufacturers are often quick to quote when advertising bamboo products – have not been proven to still work after undergoing these chemical processes.

The one decent alternative is bamboo rayon created using a chemical process known as the Lyocell process (often advertised using the brand Tencel). The bamboo rayon creating using this process uses fewer chemicals and more than 99% of the water and solvents used can be recovered,  which makes it better for the environment than viscose rayon. 

Unfortunately, lyocell rayon is more expensive than viscose rayon, so you don’t see it used that much. Most bamboo clothing is produced unsustainably but marketed as a green product. This ‘greenwashing’ confuses consumers and tricks them into believing they are making an environmentally-friendly purchase when they actually aren’t.

Overall, organic cotton is a better alternative to bamboo fabric in most cases. Consumers who want to buy bamboo fabric or clothes should carefully check the brand’s eco-credentials to see which process they are using, how efficient it is, and what the likely problems it might cause before they purchase bamboo rayon clothing.

Bamboo Toilet Roll

Bamboo toilet roll is a great alternative to normal toilet roll, which is normally created using virgin hardwood. This has led to deforestation and the removal of natural habitats; bamboo is a much more renewable source. To make matters worse, these toilet rolls are then packed in plastic packaging!

Several companies now offer bamboo toilet rolls instead. These are better for the environment and packed in environmentally friendly packaging. Bamboo can produce strong fibers without the assistance of chemicals and regrows fast, which means its ideal.

Since there are no chemicals used for manufacturing the product, if it ends up in the landfill, bamboo toilet rolls easily return to the earth. Rest assured that it will not release toxins or chemicals as it decomposes.

Like many eco-friendly choices, this does come with a higher price, but we believe it’s worth it to protect the environment.

Interested? Here are a few brands you might want to try:

Who Gives a Crap creates toilet roll from 100% bamboo, ships in eco-friendly packaging, and donate 50% of their profits to building toilets for people who don’t have them.

No. 2 offers FSC-certified bamboo toilet roll. They’re also known for their eye-catching packaging designs, which are made using soy-ink.

Bim Bam Boo is also made with FSC-certified bamboo and is aimed at women. It is guaranteed free of any ingredients that could disrupt vaginal pH.

Bamboo Biofuel

In some parts of the world, the bamboo plant is used to produce biofuel. This is when the bamboo is converted into solid, gas, or liquid fuel to provide energy. This can be done in several ways – in biomass-fed combustion plants, through the production of bioethanol, by using the bamboo to create biocrude oil, and even by using it to create a combustible gas.

Check out this detailed (and rather technical) scientific paper if you want to know more.

Should an Eco-Conscious Consumer Buy Bamboo Products?

With the exception of clothing and fabric, eco-conscious consumers should buy and use bamboo products. It’s not perfect (nothing is), but because it grows fast, has little need for pesticides or fertilizers, and decomposes naturally, it is overall a very good choice. It’s also durable, easy-to-clean, and looks nice when used for furniture. For clothing we suggest organic cotton as a better alternative to bamboo fabric; clothes made from sustainable bamboo use unsustainable manufacturing processes that harm the environment. 

As always, we recommend you check an individual brand’s eco-credentials before purchasing, but if the product is made from natural bamboo that hasn’t been chemically treated, it should be eco-friendly.

Green Home

How to Remove Black Stains From Hardwood Floors

Learn how to remove black stains from your beautiful hardwood floor

Remove Black Stains On Hardwood Floors Featured

Black stains on hardwood floors can ruin the appearance of an otherwise beautiful hardwood floor. How can you remove these stains from your flooring, and which is the best way to go? Let’s find out.

To remove the black stain on your floor, you can use hydrogen peroxide, vinegar, or baking soda. If the stain is particularly tough and you cannot get it clean, you may need to have the floor sanded, but that should be a last resort.

What Causes Black Stains on Wood Floors?

Black stains on hardwood floors are often caused by grime and dirt, pet urine, or mold. In the case of grime and dirt, a lack of regular maintenance can contribute to the severity of the stain by allowing dust and dirt to buildup on your floor and give mold an opportunity to grow undisturbed. In most cases, the longer you leave the stain, the harder it will be to clean.

  1. Grime, dust and dirt – Left to accumulate, everyday dust and dirt can cause dark, stubborn stains that can be tough to get rid of and may damage the entire floor surface and finish of your hardwood floor. If cleaned regularly, these should wipe off easily.
  2. Pets – Pet urine can cause large dark stains on wood flooring if they are not cleaned in time. Try to clean pet urine up quickly and train your pets to ensure this doesn’t happen.
  3. Mold and moisture – A damp house may experience dark water stains on wood. You may also see spots of mold growing in these dark and damp corners. Mop up excess moisture and water and consider taking steps to decrease the humidity in your home.
  4. Other Stains – Other causes of dark stains on your hardwood floor include ink spots, coffee stains, blood or food stains.

How Do You Remove Black Stains from Hardwood Floors?

Here are three methods to remove dark stains from wood without sanding (plus a note on how to sand if you need to). Please note that if you have white stains, these methods may be inappropriate. If your wood has a finish on it, then some of these substances may remove that finish.

If you are concerned about damaging your hardwood floor we recommend you consult with a professional first. This can be expensive, but they will be able to help you remove stains and dark water stains without damaging an expensive floor. Proceed at your own risk!

Warning: Wash your hands with water after you finish and follow any safety advice given, especially when handling hydrogen peroxide. We recommend you wear gloves and goggles.

How to Remove Dark Stains on Wood Flooring With Baking Soda

Baking soda, like white vinegar, is a natural substance that you can use to help clean black stains from your wood floor. Mix equal parts of water and baking soda together to create a paste and then rub it over the stain using a circular motion. Wipe away once you are finished.

How to Remove Black Stains From Hardwood Floors With Hydrogen Peroxide

With its antiviral, anti-fungal and antibacterial properties and its ability to bleach wood, hydrogen peroxide is an effective cleaning solution for all types of stains, including water stains.

You will need:

  1. A bottle of 3-percent hydrogen peroxide
  2. A spray bottle
  3. A lint-free microfiber cleaning cloth
  4. A pair of rubber cleaning gloves

To remove a black stain, spray or dab 3-percent hydrogen peroxide solution only on to the areas which are stained. Check back regularly to see if the wood has bleached back to it’s normal color (this may take several hours). Remove excess with a dry cloth.

A word of warning: the bleaching effect could make your wood lighter than you want if you are not careful, particularly if you get it on unstained wood. If you bleach the wood too much, you will need to sand it and then refinish it. Always use safety precautions when you use hydrogen peroxide to remove the stain.

To get rid of larger, darker marks, you can leave a hydrogen peroxide-soaked towel over the area for a few hours and then remove it and allow the wood surface or wood floor to dry.

How to Remove Black Stains From Hardwood Floors With Vinegar

Using white vinegar is a popular method used for removing common stains – including pet urine, dirt and grime, and dark water marks – from your hardwood floor. Naturally acidic, the vinegar will lighten and remove black stains. This method uses the same white vinegar you can buy in any local store:

Mix a white vinegar and water solution (1:1) and then apply to the stain. You can either leave it on there or scrub with a cloth. Like hydrogen peroxide, vinegar is a bleaching agent, so check back regularly and do not leave for too long. you must be careful with how much you use.

Warning: the bleaching effect of vinegar could damage your floor. We’d recommend you use the baking soda method (above).

How to Remove Stains on Wood Floors By Sanding

Sanding does remove marks, but it is a lengthy process. First, apply masking tape to protect unstained wood around the stain. Next, use fine grit sandpaper or fine steel wool to sand the stain. You may need to follow this up with a bleaching solution like hydrogen peroxide. If you have bleached the stain, you may then need to stain the wood to match the rest of the floor.

How to Protect Hardwood Flooring Against Black Stains

Keep in mind that it is easier to remove a stain before it has time to permeate and seep into the wood. Prevention is always better than cure. If you have a new wood floor, or have recently removed marks from your flooring, now is the time to take steps to keep it stain-free.

We recommend you:

  1. Protect Your Floor – Waxes and other finishes can help protect your wood floor from both dark stains and white marks. Consult a professional if you are unsure which finish is best for your particular wood. Investment now can give your wood floor many more years of life.
  2. Clean Regularly – Regular cleaning can help stop dirt and grime from building up. Try to avoid using water to clean hardwood floors, since this can create marks and instead only use a cleaning product that is designed for your type of floor.
  3. Clean Spilled Water Immediately – Your wood floor will absorb any water left sitting on it. Always clean these spills immediately to prevent marks.
  4. Use Rugs Strategically – If you have an area where water is frequently spilled, consider using a rug. The rug will soak up the water and help protect the floor. However, a damp rug could still lead to black stains.
  5. Train Pets – Pet urine not only smells bad, but can cause bad stains on your floor. Train your pets so you don’t have to worry about this!
  6. Watch out with Indoor Plants – Many plant pots allow water out the bottom. If you have plant pots sitting on your floor it could be creating dark marks underneath it. Always use a pot saucer for it.
  7. Keep Humidity in Check – The more humid your house is, the more likely you’ll get spots of damp appearing. When your floor gets damp, you start to get staining. You may need ventilation or a dehumidifier to solve the problem.

Will Hydrogen Peroxide Damage My Hardwood Floor?

It can have a bleaching effect which aids stain removal. If left on too long, or a solution that is too strong is used, it could bleach the wood too much. We recommend you use it carefully and test on a small area first.

Can You Use Mineral Spirits to Clean Hardwood Flooring?

Mineral spirits can be used to clean white marks on hardwood floors. To do this, add some mineral spirits to a very fine steel wool and then rub gently. We have not of them being used for dark stains.

Green Home

How to Remove Pet Stains from Hardwood Floors

Learn the best ways to remove pet stains from hardwood floors (and the common methods you should avoid)

How To Remove Pet Stains On Hardwood Floors Featured

Unless your dog or cat is housetrained, having them inside means you risk the possibility of walking into a puddle of urine. Nobody wants to see -or clean- pet urine or urine stains off their gleaming hardwood floors. You don’t want to smell the urine, either. But, how do you get rid of urine stain and odor?

How to remove pet stains from hardwood floors?

You can remove pet stains and odor from your floor and or another surface using cleaning solutions and methods such as hydrogen peroxide, baking soda, enzyme-based cleaners, and even blotting paper. Avoid vinegar and bleach as these may cause damage.

Hardwood floors are porous and contain many small holes that can hold moisture, making them easy to stain. The substances recommended below help to remove moisture from those spots and so clean the mess. Let’s take a closer look at what to use, and perhaps more importantly, what not to use to remove pet stains and odor.

4 Ways To Clean Pet Stains on Your Hardwood Flooring

Here are some great ways to remove pet stains-and odors from your wood without sanding or damaging your floor. 

1 – Hydrogen Peroxide

Hydrogen peroxide prevents the wood of your floor from soaking up the urine, and subsequently controls the spread of any bacteria in the area surrounding the stain, effectively drying up pet urine. 

It also neutralizes the ammonia found in pet pee, which will get rid of any lingering odor. A small squirt of dish soap and a pinch of baking soda along with the peroxide solution would also work, but be mindful of the correct measurements.

Will hydrogen peroxide damage wood, you ask? No, it shouldn’t, provided you use the right concentration: most cleaning solutions are 3% hydrogen peroxide. Stronger solutions may have a bleaching effect.

Warning: never mix hydrogen peroxide with vinegar, another commonly recommended home cleaning solution.

2 – Baking Soda

Sprinkle a generous layer of baking soda over the stain and use a good scrub, steel wool or even a dry cloth to scrape it off your wood floor. Keep the area and the baking soda dry. The baking soda will absorb moisture and neutralize pet urine odor. It has been known to work on kid urine too, just saying.

When you use baking soda, and subsequently need to scrape it off your flooring, make sure to use the appropriate cloth, scrubs and cleaning utensils. If you are using steel wool, opt for a fine-grade one, and not the cheap one you usually find. Check with a professional if you aren’t certain which products are suitable.

3 – Enzyme-Based Cleaning Solutions

Most pet shops carry dog, cat and pet-friendly enzymatic cleaning liquids that every stain and odor fearing pet owner must have at home. These cleaners break down the uric acid found in pet urine, without affecting or degrading your hardwood floor. 

Most pets have a particular, favorite pee-spot where they keep coming back to ‘mark their territory’ by smelling lingering traces of their urine in the area. This cleaner will effectively stop your pet from coming back to his peeing place and save your hardwood from any deep or permanent damage.

4 – Blotting Paper

Having to get up close and personal with pet pee, and using elbow grease to scrub away the never ending stains on your hardwood floors is not fun. Blotting paper goes a long way to quickly soak up the urine, and controls the urine from spreading to other parts of the floor. If you clean the urine in time, this prevents staining in the first place

Besides, it is definitely a more feasible alternative to running out to your garden for some sand to soak your pets’ urine.

Two Substances You Should Never Use On Your Hardwood Floor

White Vinegar

You may think that using white vinegar, a rather popular, natural disinfectant might do the trick and remove that pesky urine stain. However, there are downsides to using a white vinegar and water based solution to clean pet stains off your hardwood floors. Being acidic in nature, the vinegar can strip away the finish of the wood and will stain and discolor your dark gleaming wood floor over time, just like bleach would. 

Bleach

Using a bleach solution may seem like the best way to get rid of that awful odor. But the destruction that it may cause on not just the wooden boards of your floor, but also your carpet or any other surface would be irreparable. The acid would discolor and corrode wood floors. This discoloration would be instantaneous, and not over time, like with vinegar.

Before You Get Started

  • When using solutions like hydrogen peroxide, or any enzyme-based cleaners, make sure you are using only the right amount needed. Too much, or too little will do more harm than good to your wooden floors, and even less to remove any odors. Always check the back of the box. If you are concerned, check with a flooring professional.
  • Before you actually use any of those cleaning solutions for removing stains, first test them on a small patch of wood that is not blatantly visible. This is pretty much the same as you testing a cream on a small area of skin to check for allergies, before using it.
  • Always, always wear protective gloves while using any cleaning or disinfecting liquids.

How do you seal wood floors from animal urine and stains?

This might sound like a no-brainer, but your first step should be to house train your pets! But we recognize that even the most obliging and well trained pets may have the odd accident every now and then.

To completely protect your beautiful hardwood floors you’ll need to waterproof it by applying a finish such as a polyurethane sealant or another sealer.

Water-proofing your floors will protect them from all liquids, and make cleaning them on a daily basis all that easier. The process of water-proofing is not for novices, however, so you may prefer to have this done by a professional.

How can you remove old pet stains?

While some older pet stains might be particularly stubborn to get out of your floors, you can still use one of the methods we discussed above to remove them. If the stain is too ingrained or deep  you may need to get a professional to sand the surface of the floor down.

Can pet urine damage hardwood floors?

Yes! The longer you wait to clean it the harder it will be and the more likely you’ll have a long-term mark. Not to mention the smell… this article should tell you all you need to know about how to remove pet stains from hardwood floors.

Can you remove dog and cat stains by sanding a stain?

The objective of sanding is to remove any stain or mark on your wood, and even dents, gauges or bumps. Can sanding help remove pet stains? Yes. Depending on the quality, and the price, you can sand your wooden floor to look almost brand new. We recommend you contact a professional if you are considering removing a stain using this technique.

Green Home

Is Acacia Wood Sustainable?

Learn more about the sustainability of acacia wood (it's pretty good!)

Acacia Wood Tree on Savannah

Yes, Acacia wood is sustainable. Acacia trees are fast-growing, grow in almost any type of soil, do not need fertilizer, and rarely need pesticides. It thrives in warm, tropical climates, but a few species can also grow in cold-weather areas.

Acacia wood is typically used for furniture, although it can be used for other things. Most products used in the USA are made from just two varieties – Hawaiian Koa and Australian Blackwood – although there are more than 1,000 varieties in total.

Eco-conscious consumers should look for FSC-certified Acacia. The Forest Sustainability Council’s certification is a clear indication that the Acacia wood is grown and harvested in a sustainable manner. When the trees are  grown sustainably, Acacia wood is excellent for furniture and other uses and is known for its affordability, functionality, versatility, and beauty.

p.s. Want to know more about sustainable construction materials? Click here to check out our complete guide to sustainable materials for your home.

Acacia Wood Properties and Uses

Acacia’s hardness, strength, and durability make it scratch-resistant and less prone to wear and tear than other woods, making it a practical choice for indoor furniture, outdoor furniture, and flooring. Acacia is also highly resistant to moisture, insects, mold, and fire without the aid of treatments, which makes it easy to maintain. Its fragrant smell adds a nice, homey touch to the furniture it produces.

Acacia Wood for Furniture

Freshly-cut Acacia wood is elastic, which means that it can be easily formed into the desired shape before it is kiln-dried to achieve the required hardness. This process results in beautifully crafted and high-quality furniture, including dining tables, consoles, office desks, nightstands, headboards, stools, chaise lounge, chairs, and benches.

Acacia wood, especially when cared for, can last for decades, which allows large pieces of furniture and flooring to be reused and recycled.

Acacia Wood for Flooring

Acacia can be used in flooring as solid wood, engineered wood (a layer of Acacia wood over another wood, often plywood), or in laminate form. Planks made from Acacia are shorter than those of oak and maple trees (because the average height of Acacia trees is smaller, at about 40 feet, with a diameter of about 3 feet).

If these planks are used for flooring, more joints will be needed (than with other woods) and this may give the floor an unusual appearance. The range of colors and grain patterns will be good for some customers, although others might try a wood with a more consistent appearance.

The wood must be dried properly before used in a dry-climate home to prevent post-installation shrinking.

Other Acacia Uses

Aside from furniture and flooring, Acacia has other uses owing to its notable properties and characteristics. These include:

  1. Good acoustics: Violins, Flutes, and Ukuleles
  2. Resistance to moisture: Boats, Canoes, Bathroom Cabinets, Soapdishes, Planters
  3. Resistance to scratching: Picture Frames, Jewelry and Souvenir Items
  4. Antibacterial properties: Chopping Boards, Serving Bowls, Serving Platter

Acacia Wood Looks

Every piece of Acacia wood has a unique look due to the variable pattern of its grain, which may be either straight or wavy, and the wide range of colors it comes in, from light amber through to dark mahogany. The wavy grain patterns can be a disadvantage, though, because it is easy to ruin the grain lines of an interlocking or curvy pattern when the wood is cut.

The wood has a rustic appeal to it, making it ideal for simple but timeless pieces that blend easily with any style preference – from shabby chic to sophisticated and elegant. Unlike teak, whose light brown color fades easily, Acacia’s color does not change over time quite so readily and is likely to remain consistent, although furniture in bright sunlight or left outside is likely to show some fading.

The color variations, knots, and irregularities may add character to the furniture or flooring, but others find it showy and distracting. If you want consistency, use maple, walnut, pine, or bamboo.

Acacia Wood Affordability

Acacia is more expensive than oak and maple, partly due to its lower availability, but more expensive than teak. Acacia and teak are comparable in quality, but Acacia is the less expensive option for a couple of reasons:
First, Acacia can be harvested for a lower cost than the same volume of teak and offers growers two products to sell – the wood itself and gum arabic. Secondly, Acacia has a lower oil content, which means Acacia wood needs to be coated with wax to enhance its durability.

Because the quality of Acacia and teak are almost the same, some sellers pass off Acacia as teak so they can charge a higher price. This can be tested by shining a blacklight on the wood. Acacia will glow under the blacklight.

One negative is that Acacia trees tend to grow a lot of branches, which makes it quite a knotty wood. These knots may damage the grain so that the part that may be used or marketed may become limited. This pushes the price up since the usable part of the wood is reduced.

Caring for Acacia Wood Furniture and Other Products

Acacia products are generally low maintenance, but the following tips will help prolong its lifespan. We recommend you follow the manufacturer’s guidelines for your Acacia furniture or flooring.

  1. Mop or wipe standing water immediately.
  2. Do not expose the wood to perfume or alcohol, which can cause cracking.
  3. Do not use polishing products that contain silicone. These products may dry the wood out and cause it to become brittle.
  4. Do not use cleaning products that contain ammonia.
  5. Use a soft, slightly damp cloth to wipe away the dust. Do not use a scouring pad or any other rough material.
  6. Do not position the wood in areas with heat as the wood may warp or swell.
  7. Use coasters, placemats, or similar table accessories to rest hot drinks, soup, or hot dishes on the furniture.
  8. Rotate the position of your outdoor furniture to ensure that all sides of the wood are getting equal amounts of sunlight and air. This will ensure even coloring of the furniture over time.

Should Ethical Consumers Buy Acacia Wood Products?

Yes, Acacia wood is a fast-growing sustainable wood and a great choice for ethical consumers for both wood furniture and flooring. Look out for FSC-certified wood to ensure it has been grown and harvested in a sustainable fashion. Additionally, Acacia’s durability, aesthetic appeal, and affordability mean your Acacia wood product should last a long time.

Avatar photo

James Evans

James is a copywriter based in the UK. He writes on sustainability, finance, tech, and anything else that interests him. He likes tea.

Green Home

Oak vs Maple Flooring – Which is Best?

Discover the differences between oak and maple hardwood flooring

Oak Vs Maple Wood Flooring Featured

Shopping for hardwood flooring or furniture? Oak and maple are two of the most popular choices, but which is best for your home?

Oak is considered superior to maple for flooring. It is more durable and has a greater range of colors and grain. Maple is still a good choice and costs less, making it a great option for those with a tighter budget for their floor or who particularly prefer its look.

Read on to find out more, including a detailed breakdown on the pros and cons of both woods and more information on their differing durability, strength, types, and patterns.

Using Oak Wood For Flooring

Oak is a great choice for wood flooring. It is solid, durable, and looks great – it’s no surprise that oak is often considered the “King of Flooring.” And while oak flooring might not be as strong as hickory, it ages better with time, and looks opulent.

Oak comes in two varieties, red oak and white oak, and is available in a wide range of shades, from light through to a dark, reddish brown. While the natural finish looks beautiful, oak is also easy to stain to achieve a different finish.

Both red and white oak trees can be cut to look clean or rustic, with a wide variety in the frequency of knots and grain patterns available. Oak’s grain pattern also helps hide scratches and dents that may occur through normal wear and tear.

Benefits of Using Oak for Wood Flooring

  1. It is resistant to warping
  2. White oak is very resistant to decay, red oak relatively so.
  3. Both white oak and red oak are resistant to dents and scratches.
  4. It ages well.
  5. It stains well.
  6. It responds well to steam bending.

Cons of Using Oak for Wood Flooring

  1. It has a high content of tannin. Exposure of raw wood to wet and cold weather can lead to corrosion or staining.
  2. It is a heavy wood.
  3. It also costs more, when compared to Maple.

Using Maple For Wood Flooring

Maple is a popular choice for wood flooring. It is harder than oak, but not as study or durable. It has a light color with a subtle grain pattern which suits many styles of décor, but because the maple tree has little resistance to mold or infestation the wood must be treated before use in homes.

Let’s take a look at the pros and cons:

Benefits of Using Maple for Wood Flooring

  1. You can stain maple to look like cherry wood or some other color. Staining is a cost-effective way to make your floors the color you desire.
  2. Great for indoor projects.
  3. The wood is strong and hard, suitable for even a high-traffic floor area.
  4. It is a cost-effective option, with a lower price than oak

Cons of Maple for Wood Flooring

  1. It has little to no resistance to decay
  2. It is not the best choice of wood for steam bending or any project that involves shaping or boring.
  3. It is more porous, which makes it slightly more susceptible to dents and scrapes.

Differences Between Maple and Oak Wood

Both wood species are popular choices, but how does each material differ? Let’s take a look:

Do Maple and Oak Look Different?

Wood from maple trees is light in colour, while Oak ranges anywhere between light to natural to dark, red-brown in color. The pores on oak are visible to the naked eye and this is what gives the wood its grain pattern. Maple has more subtle pores that aren’t visible to the naked eye.

Maple vs Oak: Uses

Oak, known for its durability, is commonly used in the home for hardwood flooring and to make cabinets. It is also used in the production of wines and brandies; oak barrels are used for preserving the wines and also have medicinal properties.

Maple is used not only popular for hardwood floors, but also to make pool cue shafts, wooden baseball bats, and butcher’s blocks. It is also used in the making of musical instruments.

Is Maple or Oak More Expensive?

Oak is definitely the more expensive of the two hardwood species. However, it offers more variety like color, better grain patterns and stain quality, a solid look and finish. While maple is relatively better in terms of price and it is often not on the same level as oak in strength, durability and appearance.

Is Maple or Oak Harder?

Maple is harder than oak, although both are hard enough for most situations and uses. However, neither comes close to Hickory; Hickory is about 40% harder than oak, and the hardest used commercially in North America.

Similarities Between Maple and Oak

  1. Both are hardwood trees
  2. Both are popular species used for a wide variety of uses, including hardwood flooring, cabinets and other home furnishings.
  3. You can stain both oak and maple to get the finish and look you want.

Oak vs Maple for Hardwood Flooring

If your budget allows for either, oak flooring is probably the best choice. Its strength, hardness, range of color and available grain pattern, not to mention it’s appearance, make it a great choice for your hardwood flooring.

However, having considered the pros and cons we can confidently state that both oak and maple are a great choice for hardwood flooring in your home. If you cannot afford oak flooring, maple has many pros and is very suitable for use on your floors.

Oak or Maple for Cabinets

Maple, is considered by many to be the best of all hardwoods for making cabinets. It is highly versatile, traditional yet modern, contemporary and sleep and can be used in almost any setting. You can paint or stain it to give your cabinets the best possible appearance. Oak is also a fine choice for hardwood cabinetry with a natural look that suits many homes.

Maple vs Oak for Furniture

Both maple and oak are good choices for wood furniture. Oak is more expensive, but sturdier, while the cheaper but lighter colored maple can suit modern home decor better. You may also want to consider hickory, if you want a hard wood, or cherry, rosewood, or mahogany if you are looking for the most beautiful wood.